Known for its iconic skyline, deep-dish pizza, and winds that famously lick the city’s corners, Chicago boasts another less-tangible but equally vibrant attraction: its pulsating indie music scene. Providing ample space for indie artists to grow and graduate from hidden gems to influential creators, Chicago’s indie music scene is a hotbed of emerging talent, underground trends, and global impact. From the riveting gigs in homey venues to unique sounds echoing through alleyways, we journey through the Windy City’s dynamic music landscape. This journey uncovers the essential chords making up the city’s indie symphony: The unique characteristics that define Chicago’s indie scene, the emerging artists making strides, the underground trends pushing boundaries, and the city’s impact on the global music scene.
Exploration of Chicago’s Indie Music Scene
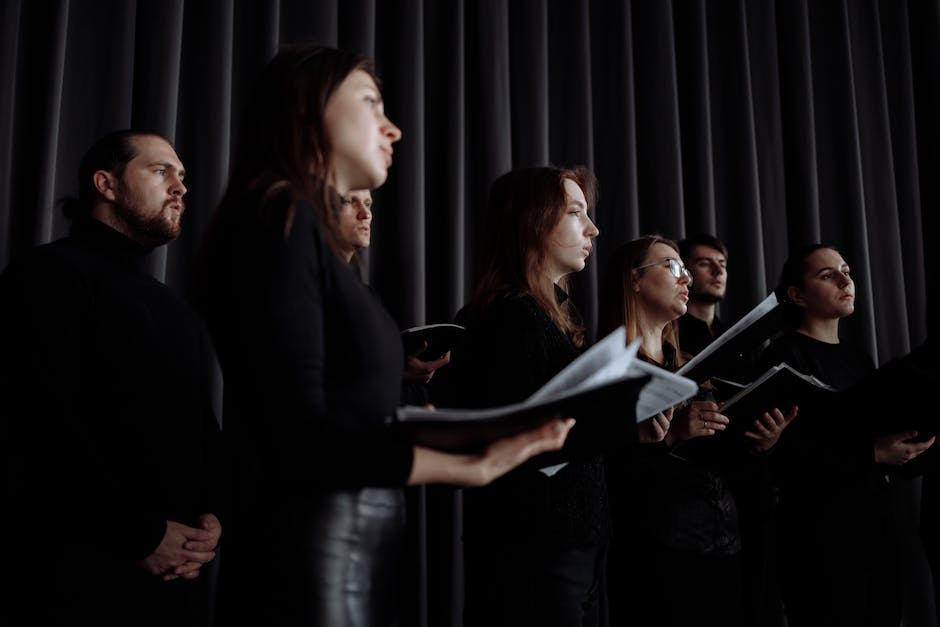
At the intersection of velvet rich history and innovative creativity, you’ll find Chicago’s indie music scene. Evolving far beyond its roots in the earthy, raw notes of the Blues, this city pulses with an undeniable musical energy that’s widely diverse yet strikingly unique. With the city’s knack for pushing boundaries, it’s no wonder it’s the place where indie flourishes like notes wafting through a balmy summer night.
At the heart of the city’s indie transformation lies an unyielding sense of community that provides an inclusive platform for artists to share their talents. A seamless synergy between veteran musicians, aspiring artists, and open-minded audiences fosters an environment where creative risks become auditory gems. Musical expression here doesn’t live in isolation, but rather intermingles, sharing and blending with the sounds of different artists.
Chicago’s indie scene doesn’t subscribe to common conventions or copy and paste formulas. Instead, musicians can be found sampling the depths of their creative wells, forging nooks and crannies of a genre that is uniquely their own. At the core of their artistry is authenticity, an unedited rawness that pierces through the cacophony, carving its melody within the hearts of music lovers.
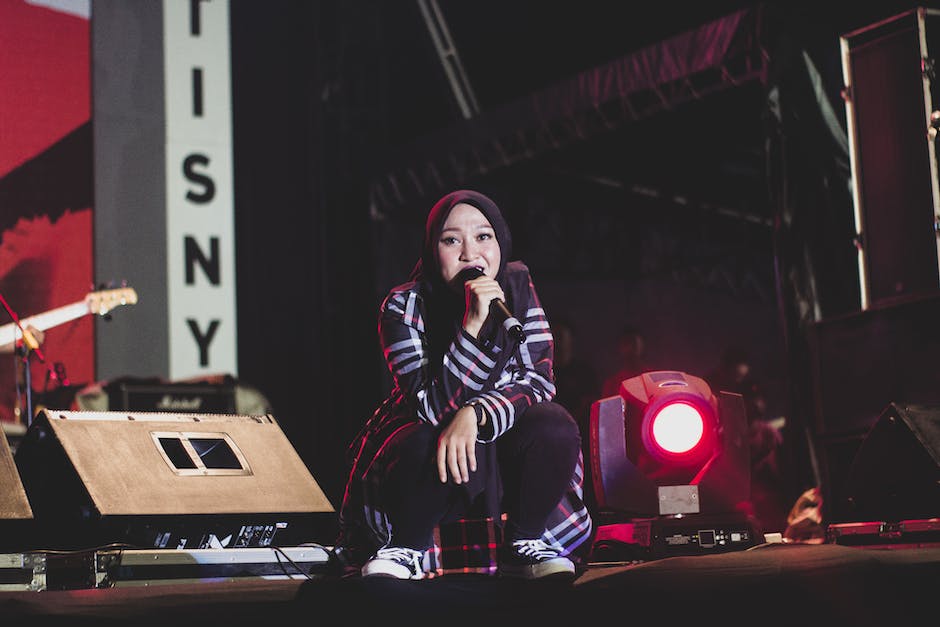
The innovation presented in the Chicago indie music scene exudes through its street performers, concert venues, and the most loved local record stores. These spaces are more than just buildings – they’re consecrated realms where devotees of sound can immerse themselves in the intoxicating world of independent music.
Then there are the festivals. Ah, these are Chicago’s heartbeats. They build temporary communities of listeners who understand the power of rhythm and lyrics that hit just right. Among them, the Pitchfork Music Festival stands out with its dedication to promoting the music of the city’s best and brightest indie artists.
Perhaps one of the most distinguishing aspects of Chicago’s indie music scene is its presence on the global stage. While staying true to their roots, Chicago indie artists have found success on an international scale. Names like Wilco, Smashing Pumpkins, and Chance the Rapper have made waves reshaping the indie music scene, putting the city on the map in the eyes (and ears) of the world.
At the end of the day, it is the city’s potent combination of community, innovation, authenticity, and global recognition that truly sets Chicago apart. Singular in its approach, brave in its delivery, and all-encompassing in its appeal, it’s no surprise that Chicago’s indie music scene beats to a rhythm of its own.
The love for music is a universal adoration, but every city sings its own, unique tune. And in hushed tones under the city lights, if one listens closely, one can hear the heart of Chicago, a city both steeped in tradition and fueled by independence, beating fervently to the rhythm of its eclectic indie scene. It’s a symphony that plays on, resonating far beyond the city streets, touching the souls of music lovers worldwide.
Chicago’s Emerging Indie Artists
Unseen Forms, Ethereal Sounds: Capturing the Resonance of Emerging Indie Artists in Chicago
Imagine a deep dive in the thriving pool of eclectic soundscapes, a jubilant amalgamation of distinct rhythmic patterns and a well of emotions waiting to brim over. That’s precisely the raw and ardent essence of Chicago’s flourishing indie music scene, a place where untamed sonic talents adhere to nothing but the rhythm of their souls. Amid this vibrant constellation, several luminaries are creating ripples yet to be widely felt but impossible to ignore.
First is a name that has hit the music community like a sonic boom: Petal Crush. With an unerring knack for infusing folk elements in their alternative milieu, the band creates aural landscapes that throb with the very heartbeat of the bustling neighbourhoods of Chicago. Their robust, artful drone compositions interspersed with the occasional melodic break act as a call back to the musical rebellions of yester-years while embedding their mark in the future of indie music.
And then, there’s Enoch Mnemonic. Underneath the enigmatic moniker is an art-pop thene who turns his dynamic computer-generated sonic collages into a metaphysical journey. Influenced by the myriad textures of Chicago’s music scene, Mnemonic cultivates an irresistible mix of experimental electronica that digs deep into the psyche. This cutting-edge digital symphony creates harmony in the chaos, raising the bar for the imminent influx of synth-pop enthusiasts.
Moving along, we arrive at the sonic shores of the indie rock powerhouse, The Drifting Bells. Brimming with youthful energy, their sound is a bracing cocktail of upbeat tempo, and thought-provoking lyrics. In places where words fail, The Drifting Bells triumphs through their deeply expressive instrumentation, creating a rhythmic assembly that’s raw yet eloquent, visceral yet subtle. Their anthemic melodies echo through the city’s local venues, leaving behind a trace of indelible influence.
Concluding the ensemble, Lady Lazarus emerges from the shadows, demonstrating a new dimension in the Chicago music sphere. Fusing the contemporary indie sound with a nostalgic 80’s pop vibe, the duo crafts infectious hooks accompanied by emotive lyricism. They redefine the ‘cool’ of music, making it more approachable, more intimate, an extension of the listener’s own narrative.
These emerging artists illustrate the evolution of independent music in Chicago. While the beat of the city continues to pulse with life, the rhythm of these artists adds to the city’s sonic heartbeat. Their experimental spirit guides fresh voyages through expansive musical realms, ever pushing the frontiers of Chicago’s indie scene. Innovation takes the stage, and music lovers eagerly await the crescendo.

Underground Trends in Chicago’s Indie Scene
Emerging concurrently with these captivating trendsetters is a new wave of cross-genre experiments that breathe fresh life into the indie behemoth that is Chicago’s music scene. The city’s astounding array of musicality and genre fluidity gives birth to a sonic archetype that transcends traditional barriers.
Take for instance, ‘The Vinyl Cipher,’ an elusive collective hatching an edgy concoction of jazz, hip-hop, funk, and soul, painted with a distinct indie brush. Their uncompromising audacity to blur genre boundaries is indicative of Chicago’s relentless spirit. The jazz chords laced with soulful melodies echo through the city’s alleyways, reminiscent of a bygone era, yet catapulting music lovers into a hopeful future.
In the realm of instrumental oddity, the alchemists of ‘Nocturnal Soundscape’ parallel no other. Working with everyday sounds, from churning espresso machines to the urban hustle, they brew an ambient brew of entrancing indie music that stretches the conventional definition of ‘instrument.’ It’s a trend mirroring Chicago’s multifaceted character, thriving in an intricate mix of chaos and harmony.
Further inflames Chicago’s indie tendency is the rise of collaboration. Numerous collectives like ‘The Underground Symphony’ leverage their diversity to conceive captivating soundscapes. The amalgamation of various stories, backgrounds, and sonic signatures ignite an idiosyncratic sound within each piece. It’s a nod to Chicago’s culturally rich populace, illuminating the reality that the city’s strength lies in its creative diversity.
In today’s digital era, music production is taking new leaps – a trend evident in Chicago’s indie music realm. Bedroom producers are making significant strides, challenging the gatekeepers of the music industry. ‘Lo-fi Sunrise,’ a trio of laptop musicians, is at the forefront of this evolution. Producing a tapestry of groovy synth loops and shimmery guitar strings, they’ve crafted a unique indie sound that’s an irresistible toe-tapper. This digital DIY ethos is intrinsically tied to Chicago’s indie spirit, illuminating the incessant drive of its residents to paddle against the current.
Moreover, Chicago’s independent radio stations are setting new trends by championing local talent. Shows like ‘Windy City Beats’ and ‘Chi-town Soundwaves’ breathe life into the scene by providing platforms for indie artists. Not only does the playlist set the city’s heartbeat, but it draws indie music enthusiasts near and far into Chicago’s musical epicenter.
In conclusion, Chicago’s underground indie music scene is not merely a hub for musical creation. Instead, it is a melting pot of innovation, shattering stereotypes, and embracing the city’s unwavering courage. The continuous evolution of this thriving community ensures that listeners worldwide are always poised for fresh auditory offerings, drenched in the soul of the Windy City. The air is electric – resonating the innumerable trendsetting anthems birthed in Chicago’s underground indie landscape.
Impact of Chicago’s Indie Scene on the Global Music Stage
Chicago’s indie scene doesn’t stop there. It is also home to The Vinyl Cipher, a daring ensemble pushing the boundaries of genre norms and successfully painting intricate soundscapes that echo through the streets of Chicago and beyond. Infusing elements of jazz, folk, pop, and indie rock, their music has become a true chameleon of style and a representation of the city’s melting pot of influence.
And, let’s not forget Nocturnal Soundscape, the instrumental trio that treats Chicago as a living, breathing instrument itself. Their innovative music features recorded ambient noise from the city’s bustling surroundings, introducing listeners worldwide to the atmosphere of Chicago’s streets.
Standing proudly within Chicago’s indie landscape has been the rise of musical collectives like The Underground Symphony. This group of like-minded artists works in unison, creating a network that pushes the indie scene forward. Their collective creativity has been a game-changer, sparking collaboration over competition, and nurturing a shift towards unity in music.
But it’s not just about the musicians on stage or on tour buses. Bedroom producers are rising out of Chicago, maneuvering the industry’s status quo with laptop studios and a hefty serving of audacity. Using their “limited” resources to the maximum, they have shown the world that music is no longer about high-budget studios and exclusive contracts.
Parallel to this democratization of music production, independent radio stations have blossomed in Chicago, becoming megaphones for local talent. Stations like WLUW and CHIRP Radio, although not leaving mainstream airplay, have made Chicago’s indie voices heard, spotlighted emerging artists and played an instrumental role in integrating local sounds with the global music ecosystem.
Unveiling the soul of Chicago’s indie phenomena is their inherent spirit of daring and innovation. The Windy City’s independent music artisans approach artistry with an audacious spirit, unafraid to redefine rules and, in some cases, abandon them entirely. Experimental sounds and obscure sub-genres thrive here, with Chicago’s independent artists remarkably expanding the musical lexicons in ways that captivate global listeners.
Even with its rich and varied history, the Chicago indie music scene perpetually evolves. It continues to resonate and ripple outward, reverberating its soulful energy and influencing the lyrics, rhythm, tone, and narratives of the global music theater. It is a breeding ground for exploration and expression and paves the way for old sounds to meet new inspirations.
Chicago’s indie scene is a testament to the infinite possibilities that emerge when passion meets creativity. Its influence on the global music community is remarkable, providing a blueprint for independent scenes everywhere and reminding us of the uncontainable power of music’s most timeless truth: it’s all about the sound and the story it tells. Music, after all, is a universal language, and Chicago’s indie scene speaks it fluently, adding distinct dialects that redefine the world’s musical conversation.

The vibrant symphony of Chicago’s indie music scene resonates far beyond the city’s limits, painting an inspiring picture of creativity, innovation and resilience. The city’s emerging artists keep enriching this music panorama with their unique sounds, solidifying the centrality of this Midwestern metropolis in the global indie music landscape. While trends are born and fade in the underground, they leave indelible impressions on the mainstream, subtly shifting the soundscape’s contours from the inside. The global music stage awaits, receptive and ready, for the fresh waves emanating from the indie scene of Chicago. This influential scene offers not just a testament of diverse musical exploration, but it perpetually serves as a lighthouse for global indie music – an indication that music, in its purest, most authentic form, continues to thrive amidst the soulful winds of the Windy City.
Chicago, fondly referred to as the “City of Big Shoulders,” carries a grand musical heritage that resonates across various genres, celebrating a range of harmonious expressive melodies, from the soulful rhythms of Blues and Jazz to the modern beats of Hip Hop, Rock, Pop, and Electronics. Leveraging this rich musical diversity, the city has carved a significant niche for itself by birthing some of the world’s most notable music festivals such as the Chicago Jazz Festival, Lollapalooza, and the Pitchfork Music Festival. These storied festivals, year after year, lure music enthusiasts, not just from the length and breadth of America, but from around the entire globe – all coming to experience and appreciate the vibrant, cobbled streets of Chicago in their full rhythmic bloom.
Historic Influence of Chicago’s Music Festivals
In the bustling metropolis of Chicago, buried beneath the concrete jungle’s skyscrapers and shimmering lights, a lively and pulsating beat echoes. It emerges from the heart of the city, reverberating through historic neighborhoods, inspiring a contagious energy that sweeps across the crowds. This rhythm has long formed the soundtrack of the Windy City, born from a rich legacy of music festivals that have contributed to the flourishing and diverse musical culture we experience today. We’re diving into how the deep-seated history of music festivals in Chicago has shaped the city’s music scene.
Picture, if you will, the birth of the Chicagoan musical sensation – a constellation of humble beginnings. It dawned during the historical Jazz Age around the 1920s, when the city’s South Side gave rise to a vibrant and stirring jazz scene. The first significant outdoor festival, the Chicagoland Music Festival, held its inaugural event in Soldier Field in 1930, attracting over 100,000 fans. In this energetic assembly of jazz aficionados and newbies, the city’s creative pulse began to pulsate rapidly, widening the scope for the all-encompassing aura of music.
As the jazz age faded into the rearview mirror, a new player was emerging on the Chicago musical stage: blues. From the 1950s onwards, the blues scene exploded across the city, with the Chess Records label releasing significant hits of the era. The Chicago Blues Festival, which debuted in 1984, has since become the largest free blues festival in the world, transcending borders and creating an indelible influence on the city’s music ethos.
Fast forward to 1991, and amidst the medley of jazz and blues, the echoes of alternative rock began to pulsate through the city. Enter Lollapalooza, a revolutionary music festival that placed Chicago on the global music map and breathed life into an alternative music scene, fostering creativity and promising a highly anticipated explosion of musical expression. Today, it stands as a multi-genre behemoth showcasing eclectic music styles from heavy metal to hip-hop, a testament to the city’s ever-evolving music milieu.
As the new millennium dawned, electronic music festivals complemented the city’s mosaic, with the Spring Awakening Music Festival taking center stage. Since 2012, it has captivated audiences with the pulsating beats of electronic dance music, solidifying Chicago’s standing as a city that is not just receptive to, but actively invites, every genre under the melodic sun.
Across these decades of rhythmic evolution, music festivals in Chicago have etched an indelible imprint on the city’s identity. They’ve not just entertained but also educated, providing a platform for different musical genres to thrive and find loyal audiences. The festivals have given birth to an ever-evolving musical scene that is inclusive, diverse, and extraordinarily versatile.
Through the power of music, unity has been celebrated, boundaries have been crushed, and messages of liberation have resonated throughout each corner of the city. From the Jazz Age to the modern era of electronic music, Chicago’s music festivals have created spaces for exquisite symphonies to mold the city’s broad musical palate. This rich tapestry of rhythmic celebrations captures the soul of Chicago – an unending love song harmonizing the past, present, and a hopeful future. A scene that is continually shaping and being shaped by its community.
Impact on Community and Culture
At the beating heart of Chicago’s lively music scene are its festivals, dynamic and diverse powerhouses that have soaked up influences from jazz, blues, alternative rock, and electronic music over the decades. Manifestations of medley beyond mere sound, these festivals are platforms promoting a diversity of styles and genres, each contributing to the pulse and rhythm of the bustling midwestern metropolis.
A deployment of diversity on epic scales can be seen at venues such as the Pitchfork Music Festival. Born in the digital age, Pitchfork has cultivated an atmosphere that celebrates and inspires every facet of music culture. With its fingers firmly on the pulse, the festival populates its lineup with rising stars and well-established artists alike, spanning genres from indie rock to hip hop, electronica to jazz. The festival, in essence, serves as a mirror to the rich tapestry of Chicago’s music tastes, reflecting the eclectic sonic landscape residing within the city.
The Riot Fest, another emblem of genre-expansive festivals, has carved a niche for itself with rock and punk artistry. Its emphasis on punk, alternative rock, and the bravura of metal resonate with a sense of rebellion and grit that is synonymously Chicagoan. The festival consistently becomes a breeding ground for creativity, as musicians, local and international, influence each other and harness this energy in their future performances and creations.
The SummerDance festival, a jewel in Chicago’s cultural crown, stirs the city with the rhythm of world music and dance, inducing a spectacular multicultural celebration. From salsa to swing, Indian bhangra to African pop, the festival showcases the city’s charismatic global identity, fostering unity within its population’s rich array of ethnicities and backgrounds.
Moreover, the proliferation of house music festivals and events such as the North Coast Music Festival denote Chicago’s definitive role in the genre’s origin story and its continuous evolution. These grooving, bass-filled gatherings further underline Chicago’s legacy as an epicenter of transformative and innovative music movements.
Significantly, it isn’t just an influx of varied music styles that these festivals encourage; the phenomena also catapult the sense of community in the city. Communal love of music transcends socioeconomic, racial, and geographic barriers, contributing to the cultural fabric of the city. It serves as a means of connection, establishing relationships among distinct groups and individuals. The camaraderie cultivated at these spaces can be seen spreading to city streets, cafes, and bar corners, effectively permeating the vibrant social energy throughout Chicago.
In conclusion, the phenomenon of music festivals in Chicago is a vigorous testament to the city’s thriving music scene. Bursting with diversity and rich in influence, these festivals echo through time, shaping the city’s cultural identity while encouraging a tight-knit, spirited community. As celestial as symphonies playing under the city lights, or as earthy as solo artists humming on the street corners, music is an element, a form of dialogue, intertwined intrinsically with the soul of this enigmatic city. Chicago’s music festivals, core contributors to this dialogue, continue to pulsate, attract and influence, amplifying the city’s music ethos while embracing an embrace of diversity that defines its spirit.
Role in Musician Development
The Chicago music scene —there’s a fervent energy to it, a vitality pulsating through each note and rhythm. It’s comprised of an intricate tapestry, woven together by a multitude of genres, some rooted in deep tradition, others freshly espousing the charm and promise of the new. This backdrop serves to stage and spotlight the dynamic array of music festivals that the city harbors.
Delving deeper into the city’s vibrant music ethos, we stumble upon the Pitchfork Music Festival—an annual summer event that presents a premier collection of artists from different genres. Staging performances from big names and breakout bands alike, from alternative rock and hip hop to electro-dance and jazz, this festival is a catalyst for both artistry and appreciation of musical diversity. It not only offers audiences a chance to discover burgeoning talent but also provides musicians sauntering across all genres a platform to elevate their reverberating sounds, consequently nurturing their development.
Amidst the festival republic of Chicago, Riot Fest emerges as another beacon of musical innovation and inclusivity. Originally a punk music festival, over time it has morphed into a three-day celebration of a diverse spectrum of music. Its display of punk rock, metal, indie rock, and even hip hop performances provide a nurturing space for musicians to harmonize their unique styles with the city’s engaging musicwire.
SummerDance Festival, on the other hand, is Chicago’s free outdoor celebration of dance and music. Encouraging participation from attendees, this platform weaves together the threads of culture, community, and musical aspirations, striving to create a fest that is as dance-centric as it is music focused. Lively beats from Latin and swing music to contemporary genres pulsate through the summer air, and musicians get an opportunity to connect with audiences on an intimate level, enriching their craft further.
One absolutely cannot talk about Chicago and music without mentioning the rhythmic lifeblood that is House music. With its origins in the city’s heart, House music has etched its way into events like Chosen Few Picnic & Music Festival and the annual celebration of House music at Millennium Park. These events offer a platform for DJs, musicians, and producers to merge their musical roots with modern innovation, creating flavorsome sonic narratives.
Indeed, these festivals epitomize the richness of Chicago’s musical landscape. But their influence extends beyond just entertainment and musicianship. They provide a melodic thread, intricately entwining the communities, building unity and fortifying the cultural fabric of the city.
Chicago, a city steeped in soulful melodies and resonant legacies, relies on these festivals as cornerstone events that uphold the city’s diverse and vibrant music ethos. These euphonious gatherings sculpt the cultural identity of Chicago, constantly morphing and adapting to the city’s shifting societal landscapes, yet eternally rooted in a shared love for music.
Pay a visit. Feel the twang of the blues, the pulse of house music, the intensity of punk rock reverberating through the city streets. Experience the unity drawn from diverse strains of sound and culture. Understand that these festivals are not just events but a genuflection at the altar of music, a commitment to a city deeply intertwined with its resonating melodies and cacophonous harmonies. It’s more than a scene – it’s a soulful symphony, playing the music of unity, diversity, and growth.

With each beat that rings through the vibrant streets of Chicago, with every melody that transcends the usual confines of musical genres and bursts forth from the city’s spectacular music festivals, a story of unity, cultural fusion, and artist evolution gets perpetually woven into the city’s cultural tapestry. The significance of these festivals in the city, therefore, moves beyond pure entertainment. They serve as arenas that nurture nascent talents and provide established artists with an enthusiastic audience. The festivals bridge communities, promote diversity, and collectively progress the city’s and indeed, the nation’s music discourse. Chicago, through its music festivals, therefore continues to play a pivotal role in the global music landscape – echoing harmony in diversity, fostering community integration, and bolstering musical talent, one beat at a time.
Chicago, a vibrant metropolis known for its rich musical heritage, provided an innovative and robust platform for the birth and development of the potent musical genre, rock and roll. The city’s socio-cultural environment, ever thrumming with diversity and creativity, played a crucial role in nurturing this raw and soul-stirring art form during its nascent stages. Within this bustling realm of rhythm and resilience, the distinct Chicago style was birthed, carrying with it significant markers that would influence the broader landscape of rock and roll. Its legacy was carried forward by bands that embody the spirit and ethos of the Chicago sound, playing their chords in venues that would become the heartbeat of the city’s rock and roll scene. Pulsating life into every corner, these venues became the incubators of talent, tailoring a community that thrives on the genre’s vivacity.
The Birth of Chicago Rock and Roll
Magnify the spotlight, roll in the drum kit, and let the electric guitar wail—the Great Lakes City, Chicago, has always been a vivacious cradle of rock and roll soundscapes. From its roots in blues, soul, and urban jazz right through to its distinguished rock revolution, this iconic city has birthed a tasteful blend of sonorous chronicles that continue to shape the global rock tableau. But what ignited this fiery creative explosion? Where did the sparks originate?
Let’s turn back the clock to the dawn of rhythm, soul, and soaring guitars that painted the shiny, blustery cityscape of Chicago—the defining moments that fueled the city’s rock and roll revolution. The magic began in the formative years of the 1950s, when blues, jazz, and gospel music were melting into newer forms of artistic expression. Change could be sensed through the rustling tree-lined streets and along the bustling backstage corridors—rock and roll was emerging.
Enter Chuck Berry. Originally a blues player, Berry’s innovative mix of country twang and rhythm and blues stirred a frenzy within the Chicago music scene. His electrifying performances and revolutionary sound at the Chess Records studio in Chicago pulsated beyond city limits, capturing the attention of a nation ready to rock. A pioneering moment, Berry’s Chicago contributions were instrumental; they bore the first vibrant hues of the city’s rock and roll canvas.
Less than a decade later, rage, rebellion, and reflection were vibrating off the walls of Whisky A Go Go in Chicago’s Near North Side. Teens clambered to hear the raw, impassioned performances by bands such as The Shadows of Knight and The Cryan’ Shames. The cultural ignition set off by the British Invasion had permeated the Midwest—changing the scene from quiet crooners to raucous rockers almost overnight. This was a turning point—rock music now had a permanent, indelible stamp on Chicago’s cultural identity.
It was the 80s though, that truly defined Chicago’s place on the rock and roll map. Take for instance, the absolute game-changer – The Metro. It was not just a popular concert venue but a cultural phenom which, for years, fostered the city’s burgeoning love for alternative and indie rock. Local bands like Big Black and Naked Raygun set the stage ablaze with their underground punk-rock ethos, while the Smashing Pumpkins honed their skills within its nurturing walls before exploding onto the global scene.
Not to be overlooked is the significance of Cheap Trick’s rise to fame. Hailing from Rockford, a city just outside Chicago, their unique blend of rockumentary flair, hearty pop, and energetic performances charmed an entire generation.
So, what is it that kindled the heart and soul of Chicago’s rock and roll revolution? From Chuck Berry’s groundbreaking sound, through the exuberant British Invasion, to the nurturing of the alternative rock scene and the birth of local legends, the defining moments are as eclectic as a vinyl record collection. Through each era, the city’s heart has echoed the beat of a drum, the strum of a guitar, and the raw vocal rally of rock music—propelling a musical legacy that continues to ripple through the breezy corridors and high-rises of Chicago. And remember, in Chicago, the harmony of rock and roll will always echo along the shores of Lake Michigan, forever intertwining its notes with the winds of the Windy City.
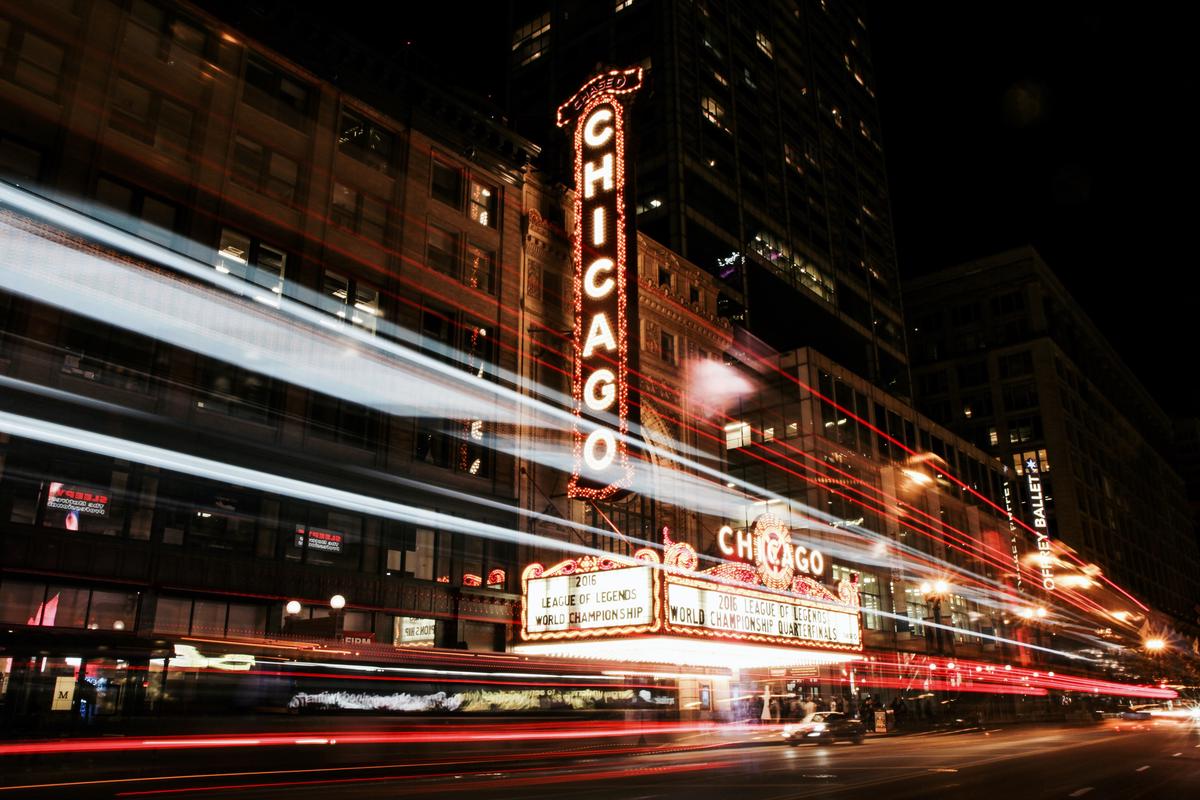
Photo by nealk on Unsplash
Key Bands That Defined Rock and Roll in Chicago
Diving further into the annals of rock and roll history in the Windy City post-Chuck Berry era, attention must be paid to the bands that crafted the unique rock fabric. Among these were The Shadows of Knight, Styx, and The Smashing Pumpkins – stalwarts whose monumental contributions shaped Chicago’s rock legacy.
The Shadows of Knight, dubbed as among “the kings of ’60s Garage Rock,” played an undeniably vital part in the evolution of Chicago’s rock scene. They blazed an incandescent trail, deftly blending British rock invasion influences with tried-and-true garage punk, effectively giving voice to the gritty, unrestrained essence of Windy City rock. Their chart-busting take on Van Morrison’s “Gloria” drew masses to embrace garage rock, transforming what was once an underground scene into a mainstream musical melee.
As the landscape of rock music morphed and evolved, along came Styx, a band that morphed and evolved with it. Styx, known for their grandiose rock, became one of the trailblazers of the progressive rock movement in the 70s along with their electric live performances. They proved rock could be a sonic spectacle, mixing elements of classic rock with theater, symphony, and an almost operatic grandeur. Styx’s audacious compositions, dramatic lyrical themes, and robust stage performances amplified the prevalence of prog-rock, catapulting it into the mainstream and reshaping music buffs’ impressions of rock and roll.
Jump to the end of the 20th century and one cannot ignore the seismic influence of The Smashing Pumpkins. The band emerged just as grunge was beginning to seep into the mainstream, but unlike their contemporaries, they incorporated heavy doses of psychedelia, goth, and heavy metal into their sound. Their hypnotic tracks served as an exhilarating journey through soundscapes filled with heavy guitar riffs and snarling vocals, painting a kaleidoscopic picture of alternativity in rock creativity. Their distinctive, innovative style played a vital role in augmenting the soundscape of Chicago’s rock scene in the 90s and carved out a distinct space for alternative rock, fostering its growth and evolving Chicago’s musical identity.
Collectively, these bands worked like churning cogs in the gears of Chicago’s rock evolution, each adding their shades of punk, prog-rock, and alt-rock to the ever-vibrant musical canvas. By effortlessly fusing a myriad of influences and introducing innovative rock stylings, The Shadows of Knight, Styx, and The Smashing Pumpkins richly contributed to amplifying Chicago’s resonance in the world of rock and roll. Their dynamic imprints continue to pulsate within and beyond the city, forming an enduring legacy at the core of Chicago’s enriched sonic package. Penetrating the past, the present, and inevitably the future, their music, and the movement it fostered, remain as echoes of their indomitable spirits etched into the soulful soundscape of Chicago.
Photo by bencollins on Unsplash
Legendary Rock and Roll Venues in Chicago
Delving further into Chicago’s rock and roll bedrock reveals the city’s hidden gems; the Shadows of Knight, a group vital to the evolution of the rock scene in the Windy City. The band immersed themselves in the craze of the British rock invasion and infused its influences with the raw energy of garage punk, creating a unique sound that resonated profoundly in the heart of Chicago. With their successful cover of Van Morrison’s “Gloria” hitting the US Billboard Hot 100, the Shadows of Knight validated the potency of Chicago’s rock scene at a national level.
Yet it was not just the Shadows of Knight who sculpted the bedrock of the city’s musical landscape. The 70s saw Styx gaining momentum, stepping up as the rock scene’s new torchbearers. A cornerstone of the then burgeoning progressive rock movement, Styx embodied an audacious spirit, blending theater, symphony, and grandiose elements into their rock music. The band’s compositions were not mere songs; they were stories that unfolded with each chord, sweeping the audience along on their narrative journeys. Styx’s daring performances created ripples that transformed the face of prog-rock, raising the genre to greater prominence.
As time moved to the beat of rock and roll’s restless heart, Chicago saw yet another band rise during the grunge era of the 90s — The Smashing Pumpkins. While awash in a sea of flannel and distorted guitars, the band managed to cultivate their unique voice, merging elements of psychedelia, goth, and heavy metal into their sound, pushing the boundaries of the city’s rock performance. The Smashing Pumpkins were instrumental in fostering alternative rock’s growth, adding another layer to the intricate tapestry of Chicago’s music scene.
These bands, The Shadows of Knight, Styx, and The Smashing Pumpkins, converged at the heart of Chicago’s rock trajectory, each contributing to a singular, dynamic vision. They embodied the pulsating core of the city’s rock evolution, marrying genre and performance with a sense of place, painting a picture of a city alive with rhythm, rebellion, and innovation. The enduring legacy of these bands has not only added to the rich tapestry of Chicago’s rock and roll identity but also acted as a beacon, inspiring future generations of musicians and fans alike.

Chicago Rock and Roll: Influence and Legacy
Embodying the spirit of rock and roll’s prodigious energy, The Shadows of Knight, a band of young lads hailing from Chicago’s Northwest suburbs, beckoned a new era in Chicago’s rock epoch. They shimmered in the mid-’60s, fused the raw potency of garage punk with the resonating influences of the British Invasion, creating a heady musical cocktail that made them a sensation. Dripping with youthful rebellion, the band’s electrifying cover of Van Morrison’s “Gloria” scaled the Billboard Hot 100, setting new bars for rock and roll intoxication, and laying groundwork for Chicago’s rock scene as a predator of chart successes.
By the ’70s, progressive rock emerged as an offshoot of psychedelic culture, with Styx flawlessly embodying the surge. Injecting theatrical flamboyance, symphonic grandiosity, and razor-sharp compositions into rock music, Styx charted a novel territory. Their bold endeavor of merging epic narratives and elaborate stage performances with rock music further solidified Chicago’s standing as a progressive rock playground. Styx’s daring experimentations risked endangering the conventional, but they instead ended up trailblazing a new path, one that flung the doors wide open for later acts to enter the realms of prog-rock.
When the Smashing Pumpkins blossomed into the raggedly beautiful grunge-packed ’90s, they clung tight to their Chicago roots. Unveiling a distinctive sound—colored with psychedelia, haunted by goth, and heavy with metal—the band fueled the alternative rock revolution congregating in the heart of Chicago. Commanding the alternative soundscape, the quartet fused poetics with distorted guitars, leaving the Windy City stardust-spangled.
As melodic streams converged, the influence of The Shadows of Knight, Styx, and The Smashing Pumpkins collectively roiled, creating a swirl that reshaped the rock topography of Chicago. Make no mistake, this medley didn’t happen overnight, nor was it a consequence of mere serendipity. It was the persistent thrumming of innovative minds who dared to brush the fringe, refusing to be straitjacketed by norms.
Their contribution extends beyond what could be measured in tracks, records, or even applause. They’ve etched marks that keep on inspiring and guiding aspiring musicians, fostering richness, diversity, and fierce originality in the Chicago rock scene. The legacy they’ve bestowed upon Chicago’s rock community reverberates with the same raw intensity as their music. Steeped in creativity and exuberant energy, these bands eloquently explored the artistic frontier, shaping the very fabric of rock music and creating a canon for future generations to push.
Indeed, it’s the passionate magic spun by The Shadows of Knight, Styx, and The Smashing Pumpkins that rippled into the modern music scene, painting it with unique shades of rock and roll that persist in defining the identity of rock music in Chicago. Their legacy—a testament to their innovation and their irrevocable connection to Chicago—represents more than an extravagant past. It symbolizes a propeller into an uncharted future. It’s a vibrant promise that Chicago’s rock and roll heritage will continue to tantalize, nurture, and astonish in a rhythm only it can set.

A panoramic glance at the legacy of rock and roll in Chicago calls for acknowledging its ceaseless influence on contemporary music. Its authentic charm and unfettered vibrant energy remains intact in the rhythm and lyrics of present-day bands, brewing inspiration within emerging talents to carry forward the torch of this dynamic genre. The evolution of rock and roll in Chicago speaks volumes of its enduring connection with audiences, reflecting the city’s spirit— resilient, innovative, and deeply rooted in musical brilliance. Whether it’s the foot-tapping beats or the emotion-packed lyrics, the legacy of Chicago rock and roll continues to echo through the corridors of music history, proudly paying tribute to a genre that transformed the city’s soundscape and established a quintessential Chicago beat that will forever reverberate in the hearts of rock and roll enthusiasts.
Chicago Soul: a powerful genre, born amidst civil unrest, became a distinct voice that echoed through the ages. In the 1960s, this genre emerged as a dynamic blend of gospel, blues and other vibrant expressions of afro-centric music. Tracing its roots, we uncover the profound influence of a transformative era marked by cultural shifts and socio-political changes. Groundbreaking artists, iconic songs, and impactful record labels – each element played an integral role in shaping its legendary landscape. But more elusive is its ongoing influence, woven into the fabric of modern R&B and Soul. This exploration not only unravels the origin and identifying traits of Chicago Soul, but it also maps its indelible mark on our contemporary music scene.
Origins of Chicago Soul
Replete with emotional resonance, inherently captivating, drenched in sophistication and reigning supreme in the 1960s, Chicago Soul is nothing short of a melodic odyssey. This distinctive sub-genre of soul music birthed within the breezy cityscape of Chicago, brimming with vibrant culture and robust artistic expression. Chicago Soul is not merely a genre; it represents a musical chronicle that rings of a city, time, place, and people.
Unlike the raw Southern Soul renditions or the smooth polish of Motown pulsed with sumptuous orchestration, Chicago Soul lies nestled in its own sweet spot, embodying a unique blend of gospel, blues, and upbeat rhythms. The signature blend of buttery vocals supported by tantalizing horn sections and rhythmic bass lines all contribute to the genre’s enduring appeal. This potent mix seeps deep into the heart, resonating with intense human emotions – pain, joy, longing, love, despair, and hope.
From Curtis Mayfield’s resounding falsetto and The Impressions’ harmonious undertones to the stalwart Jerry Butler’s passionate soulfulness, Chicago’s imprint on Soul is palpable. These artists have leapt into the pantheon of musical greatness, their work becoming sonic monuments in the rich tapestry of Soul music.
Moreover, it’s impossible to overlook the indelible impact of the indispensable Chess Records, a lighthouse in the dark seas of uncertainty that navigated artists to their destined shore of success. Releasing groundbreaking works from the likes of Etta James, Little Milton, and Muddy Waters, the label bravely hoisted the banner of Chicago Soul to towering heights.
Built upon the robust foundation of blues and gospel with a dash of rhythm & blues, Chicago Soul began to permeate the airwaves in the 60s. Despite the seismic shift in musical tastes over the last six decades, it persists as an absolute phoenix—alive, thriving, and reeking of resilience in its glorious existence.
Chicago Soul‘s historical foundation trod the gritty alleys of African American churches, closely knit neighborhoods and underground clubs. The music was an audible echo of the Civil Rights Movement—pleading, protesting, fighting, and rallying for freedom and equality. Through the medium of this emotionally charged music, the stories of struggle, the messages of hope, and the bittersweet tales of a resilient community were echoed far and wide—spanning continents, piercing barriers, and uniting people on a global canvas.
Each Chicago Soul composition is seasoned with electrifyingly unique features like intricate rhythms, expressive harmonies, and the unparalleled prowess of wind instruments. The string sections in this genre are quintessential, cutting through the melody and enhancing it with a rich, complimentary texture.
So, as we let our souls drown into the stirring symphony of Chicago Soul, it’s not just music that we imbibe. We are soaking in pieces of history, fragments of a resolute spirit, raindrops of struggles, and sparkles of hope that radiate in the comforting bosom of music. And isn’t that the power of music after all? The ability to make us feel a thousand things, walk a million miles, and yet bond us together in an inexplicable human chain of rhythmic unity— it’s truly the soul of Chicago, echoing through time.
Photo by erol on Unsplash
Influence of Chicago Soul on Modern R&B and Soul
As the story of Chicago Soul continues to unravel, we find pulses of its heartbeat still resonating across modern R&B and Soul music. This influence is woven into the very fabric of these genres, stitching together stories of the past and melodic narratives of the present. After all, to examine the progression of contemporary R&B without considering Chicago Soul is like trying to appreciate a symphony without its orchestra – the essence is unmistakably missing.
Chart-topping melodies laden with lyrics of raw emotion and vulnerability often echo the expressive elements of Chicago Soul. Ascending from the rhythm and blues framework, modern R&B carries the legacy of this sub-genre by exploring socially conscious themes with a gospel-influenced fervor.
Prominent in modern R&B and Soul is the use of gospel’s call-and-response, an iconic trait of Chicago Soul. Listen closely to the intersection of vocals and instrumentation. The ebb and flow may be more subtle, but it’s certainly there, echoing the engaging dynamic of conversation – a free-flowing duet of emotions and experiences. This interaction, which originated from gospel music and was squarely integrated into the heart of Chicago Soul, is a vibrant thread that weaves through the fabric of contemporary R&B.
Furthermore, the distinct influence of Blues, another element that gave Chicago Soul its rich texture, can still be unearthed in the sonic landslides of modern R&B and Soul ballads. Its characteristic emotional honesty serves as a guiding light that continues to illuminate the path for many contemporary artists.
The indomitable legacy is carried forward by a new generation of seekers who channel the spirit of Chicago Soul pioneers. Emulating the likes of Curtis Mayfield and Jerry Butler, artists such as John Legend and Miguel unabashedly express their truth through music, drawing from the reservoir of emotional depth that defines Chicago Soul.
Despite the evolution of genres and the development of music technology, the influence of Chess Records continues to pervade. We witness this heritage in the operation models of present-day independent labels committed to uplift and catapult a diverse spectrum of complexion and experience in the music scene.
Having ventured far beyond the confines of the Windy City, the influence of Chicago Soul continues to make waves in the ocean of modern music. It twists and winds through the scores of numerous renowned R&B and Soul artists, propelling them to produce soul-baring records that reach the hearts of the masses.
Chicago Soul’s raw passion and craft still serves as the rich loam from which today’s R&B is cultivated. Its engaging rhythms, expressive harmonies, and socially conscious lyrics are more than just the roots; they are the veritable lifeblood of modern R&B and Soul. The music industry, shaped by the historical narrative of struggle and resilience, continues to echo this Chicago-born art form, reminding us all that music is, and always will be, a universal language of unity and shared experience. Its beat resonates across time, breeding connective strands between generations and facilitating dialogues that transcend barriers.

Photo by erol on Unsplash
Legacy of Chicago Soul: Beyond the Music
Delving deeper beyond the pulsating rhythms, throaty vocals, and resounding choruses, the impact of Chicago Soul stretches far beyond the realm of music. It is more than an artistic expression – it is a cultural reverberation that transcends space and time.
With roots planted firmly in the rich soil of the Windy City, Chicago Soul marks an indelible footprint within the landscape of Rhythm and Blues. Artists such as Sam Cooke and Curtis Mayfield were more than talented vocalists, their music painted vivid pictures of life experiences, bartered through thought-provoking lyrics. Their contribution, along with others, constructed a solid foundation upon which modern R&B and Soul continues to build. Today, chart-topping artists serve up soulful dishes seasoned with the raw emotions and gritty undertones that Chicago Soul is famously known for.
The tones of gospel that provided the lifeline of Chicago Soul still resonate today. The thrilling call-and-response, taken straight from spiritual hymnals, can be traced to modern Soul and R&B performances and recordings, fostering a palpable sense of connection between artist and audience. This becomes a sweet reminder of the Soul genre’s gospel roots.
The Chicago Soul sound was, in part, a beautiful reconciliation of upbeat rhythms and soul-wrenching Blues. This symbiosis can be caught whispered in today’s R&B ballads, the authentic gritty strains of Blues intertwined subtly with fluid melodies and complex compositions, offering a steak of depth to the listener’s palette.
Today’s artists pay homage to their predecessors by channeling the raw emotion and spirit that the pioneers of Chicago Soul poured into the genre. Modern performers embellish their work with a whisper of the past, kindling the flame first lit by the Chicago Soul masters.
The consequential role played by Chess Records in promoting Chicago Soul breathed life into independent record labels, framing a template for artist management. Their influence has perpetually encouraged the rise of independent artists, demonstrating that with the right platforms and strategies, it is possible to make a significant imprint in the music industry.
The influence of Chicago Soul is far-reaching, impacting various elements of modern music – from hip hop samples stitched with soulful beats, to the unraveling of lyrical narratives within pop compositions. It is both the hidden undercurrent and proud crowning glory of contemporary tunes.
Reflecting on the undeniable impact of Chicago Soul, it becomes apparent that the genre is characterized by more than just melodies. It stands as a monument of raw passion, meticulous craft, keen social consciousness, and unbroken resilience. This spirit continues to permeate modern R&B and Soul, inspiring artists to lean into the unfiltered emotions and candid narratives that form the backbone of the Soul genre.
Chicago Soul serves as a timeless testament to the power of music – a universal language that bridges gaps, shatters barriers, and establishes connections transcending generational differences. It is a tangible thread interweaving past, present, and future, beautifully exemplifying the enduring significance of this extraordinary musical genre.
Our examination concludes that the impact of Chicago Soul extends far beyond our earphones, influencing an extensive network of pop culture facets. It pulsates through film scores, dictates fashion statements, and fuels activism. The essence of this mighty genre permeates the soul of the Windy City itself, and further, it serves as an anthem for social change. Thus, the legacy of Chicago Soul emerges as a broad manifold, subtly shaping and reflecting the world around us. A testament to its timeless resonance, the genre continues to inspire and redefine our understanding of not only music, but of cultural identity, societal shifts and the power of artistic expression.
Gospel music, renowned for its soul-touching melodies and exuberant harmonies, has been integral to the American cultural tapestry, echoing the shared experiences and resilient spirit of its African-American originators. Chicago holds a distinct position in this rich narrative, being recognized as America’s ‘Gospel Music Capital’. The transformation of gospel music from local church choirs to the global stage strongly resonates with Chicago’s own evolution, deeply intertwined with the rise of the genre. This undertaking explores the origins and unfoldment of Chicago’s Gospel Music, its pivotal personalities and institutional influencers, and the international influence it has garnered over decades.
Origins and Evolution of Chicago’s Gospel Music
Let the needle drop, the amplifiers roar and allow the melodies to rush in on a cascade of soul-stirring rhythms that catch breaths and hearts alike. We find ourselves on a sonic quest to discover the roots of a genre that has been the very pulse of American music for decades. We are talking about Gospel music – an art form that goes beyond entertainment, serving as a beacon of hope, a testament of resilience, and a vehicle of spiritual expression. The question we’re carrying ourselves on this rhythm-infused journey is this – “How did Chicago become the hotbed of Gospel music in America?”
The Windy City, as Chicago is often referred to, has been a nexus of music innovation that has pushed boundaries time and again. In the grand, sweeping concertos of American musical history, Chicago holds a key signature all its own, especially when it comes to Gospel music. To understand this phenomenon, let us hike back to the Great Migration.
In the early 20th century, millions of African Americans moved from the Southern rural areas to Chicago, seeking better economic opportunities and an escape from relentless oppression. They didn’t just bring their hopes and dreams, they brought their blues, their jazz, and most critically – their Gospel.
Gospel music, deeply entrenched in the contours of African American religious life, was met with a humming city ready to amplify its sound. In the profound echoes of Chicago churches, Gospel music found the perfect breeding ground. It was here that Thomas A. Dorsey, now celebrated as the ‘Father of Gospel Music’, transformed grief into a genre-defining composition, ‘Take My Hand, Precious Lord.’ His pioneering work, aligning traditional hymns with blues tunes and jazz rhythms, were epitomised by Chicago’s particular cultural fusion.
A significant and unignorable catalyst in this genesis was the Gospel Caravan, a traveling Gospel talent showcase that sought to deliver God’s message through music. Chicago was an essential hub for these concerts, serving as the birthplace of many Gospel legends like Mahalia Jackson, who often electrified the audiences with her furious spirit and profoundly poignant voice.
Radio played a critical role in giving Gospel music wings in Chicago. ‘Negro Gospel Singing’ was a popular segment on several radio stations, bringing the enchanting performances of the Gospel caravan right into living rooms across the city, thereby transforming Chicago into a pulsating sanctuary of Gospel music.
On these hallowed stages and in the sacred confines of Chicago churches, Gospel music flourished. It rose to the pinnacles of popularity and influence, adorning itself with the sky-reaching refrains and foot-stomping rhythm that have since become its identifying marks.
In the vibrant mosaic of America’s sonic landscape, the sea of Gospel music that washes over Chicago is a testament to the city’s deep connection with this genre. Gospel became the cradle of soul and the catapult of the civil rights movement. In Chicago, the roar and rumble of the ‘El train’ carry its soul, and if listened to closely, one can hear the unmistakable rhythms of this captivating city’s Gospel heartbeat. Truly, through countless live shows and raw, heartfelt musical expressions, Chicago proudly clinches the title of America’s ‘Gospel city’.
So, we find ourselves at the end of our reverberating exploration. Still swept by the cadence and chorus of Gospel’s jubilant hymns and bluesy refrains, we allow ourselves a final whisper of appreciation and admiration- this is the sound of Chicago, this is the sound of resplendent resilience – Gospel.
Key Personalities and Institutional Influencers
Imbued with the promise of redemption and the power of unity, gospel music in Chi-Town is a rhythmic testament to the city’s rich musical history.
The genre’s evolution was nurtured by the myriad of hands, vocal cords, and souls that put their blood, sweat, tears, and love into it.
Many pioneers pushed this vibrant genre onto new horizons, and that journey continues today through the torchbearers who carry on their legacy.
Mahalia Jackson, the proclaimed “Queen of Gospel,” is a formidable figure in this tale.
A New Orleans native, she emigrated to Chicago and swiftly made her presence known with her heavenly voice that echoed through the halls of St. Luke’s Baptist Church.
Her voice, resonating with distinctive rich tones and saturated with emotional depth, contributed significantly to the popularization of gospel music.
Beyond recording and performing, Jackson spent her lifetime advocating for gospel music, ensuring its rich traditions were celebrated, acknowledged, and perpetuated for generations to come.
Beginning with the Golden Age of Gospel, the Harmonizing Four, led by Joseph Williams, emerged as vital contributors.
Their blend of sacred hymnals and secular blues distinguished them from earlier quartet styles, leaving an indelible mark on gospel music.
The infusion of blues characteristics into the otherwise religious genre played a significant role in the development of the “Chicago style” of gospel.
Among the second wave of innovators was the reverend James Cleveland.
Described as the “King of Gospel,” Cleveland combined traditional gospel with modern elements.
His innovative songwriting, soul-stirring delivery, and unstoppable energy ignited the world of gospel music.
His vision gave birth to the Gospel Music Workshop of America, an organization that continues to churn out gospel music talent in Chicago and beyond.
Coming to the vanguard of gospel torchbearers in modern times, we find artists like Donald Lawrence and Ricky Dillard standing tall.
These exemplary musicians, directors, and producers continue to shape the genre with their distinctive styles.
They balance respectful homage to the traditions of gospel while consciously driving it to new territories.
Their sounds unequivocally echo the corridors of the past and yet, resonate profoundly with contemporary audiences.
Chicago’s gospel scene is also indebted to collectives like the Chicago Mass Choir.
Since its formation, this ever-evolving ensemble has kept gospel music’s heartbeat strong in the Windy City and beyond.
Its diverse repertoire combines traditional, spirited gospel hymns with cutting-edge compositions, offering something for everyone in their musical congregation.
The music of these individuals and groups has not only lifted many spirits but also has driven significant social change.
Gospel music in Chicago extends beyond the four walls of the church, into the streets, community centers, and the very heart of the metropolis.
With each melody composed, and every poignant lyric sung, gospel music further entrenches itself into the very soul of Chicago, preserving the past while pioneering the future.
The Global Influence of Chicago’s Gospel Music
The sparkling narrative of Chicago’s Gospel music wouldn’t do justice without mentioning the substantial impact it has on the global music scene. Gracing the ears of patrons worldwide, the sonorous sound from ‘the Windy City’ inspires and uplifts, blending the spiritual with the soulful in a unique harmony that resonates across borders.
One perceives, straight away, hearers across the globe adopting the rhythmic patterns, melodic constructs, and vocal expressiveness that is distinctively Chicagoan. This is evident in the tunes of international Gospel artists who mirror the city’s distinctive earmarks in their music, such as the powerful vibratos, the heartfelt contralto, the expressive falsetto, and the grand crescendos that punctuate the divine ecstasy of Gospel music.
Furthermore, a survey of global proceedings exposes the presence of Gospel music festivals in areas as diverse as the UK, Africa, and Australia. Each of these draw inspiration from the cosmopolitan music scene of Chicago, confirming its universal appeal. One can’t help but marvel at the influence of an art form birthed in the humble churches of Southside Chicago finding its melodic voice around the globe.
The Gospel music of Chicago, as diverse as the city itself, has permeated other music genres, blurring boundaries, and establishing stylistic bridges. R&B and Jazz owe much of their soulful undertones to Gospel, while Hip Hop frequently samples Gospel-laced tracks to convey messages of hope and resilience. This infusion of genres, which can be traced back to the musical prowess of the Windy City, has considerably shaped the global music scene and continues to do so.
In this digital age, through music streaming platforms and social media, Chicago’s Gospel music has had an even wider reach, with playlists dedicated entirely to ‘Chicago-style’ Gospel. The city’s role as a pivotal promoter of Gospel music is recognized worldwide, with music enthusiasts globally singing praises in the Chicagoan cadence.
Perhaps the shining testament to Chicago’s impact on the global music scene is the sheer number of international artists who have traveled to the city for training and inspiration; soaking up its rich Gospel history and carrying back to their homelands the singular essence and vibrant pulse that is Chicago Gospel.
It’s also significant that Chicago’s Gospel music industry, through its rich repertoire of artists and creative thinkers, has directly contributed to the global music economy. From international record sales, music publishing, concert performances, to inspirational music workshops, the multilayered influence of Gospel music is deeply felt and wholly acknowledged.
In essence, the spirited resonance that Gospel music in Chicago creates, travels beyond geographical boundaries, stirring hearts and tapping feet in lands far-flung, casting a soulful symphony that unifies humanity under its divine melodious canopy. The spirit encapsulated within the stanzas and bridges of the city’s Gospel music, fundamentally, underscores the global soundtrack of hope, resilience, and shared humanity. A timeless, borderless performance – Chicago’s Gospel music remains a universal delight, an enduring gift to the world.
Chicago’s gospel music has not just been a sound of solace and joy, but an empowering medium for cultural expression and unity. From its humble church beginnings, it has permeated global music, seamlessly blending with a variety of genres from R&B to rock. This unique form of music continues to resonate worldwide, shaping popular culture and breaking racial and cultural barriers. The influence of this powerful genre extends beyond music, fashion, dance, and social attitudes, proving that Chicago’s gospel music is much more than just music. It’s a stirring story of inspiration, innovation, and indomitable spirit that continues to create ripples worldwide.
Page 1 of 24 1 2 3 4 5 » ... Last »