In the vast spectrum of sound recording and production, one method stands out for its unique ability to replicate human hearing with astounding accuracy: Binaural Recording. Through this immersive technology, anyone wearing a simple pair of headphones can experience the incredible sensation of three-dimensional audio, feeling as though they are sitting inside a concert hall, strolling through a bustling city, or immersed in any auditory scene the recording presents. Striding away from traditional stereo techniques, binaural recording uncovers a more natural and intimate sound experience, captivating the listener in unparalleled ways.
Understanding Binaural Recording
Binaural Recording: The Gateway to a Profound 3D Sound Escapade
Music – It’s the light that pierces through the opaque canvas of the world, the universal dialect that transcends linguistic barriers, and the unseen thread that interweaves and connects souls. A sphere of influence that is far-reaching and unfathomable, emitting waves of emotions and evoking a chorus of feelings within us. And when you combine this magical entity with technology’s prowess, a symphony of sensational experiences awaits. One such confluence is the revolutionary soundscape called binaural recording.
Unlike stereophonic or surround sounds, where the audio might seem to come from various directions or distances, the charm of binaural recording lies in its ability to generate an immersive, three-dimensional auditory experience. Poetically speaking, it’s akin to plucking the symphony straight from the concert hall and plunging it right into your ears, capturing every nuance, every resonance with stunning accuracy.
But what exactly triggers this unrivaled, palpable musical experience? The answer, interestingly, lies in the human auricle, the technical term for our ears. When a sound wave envelopes our ears, slight time and amplitude variations happen based on the direction it comes from. This intricate process called HRTF (Head-Related Transfer Function) is the foundation stone for binaural recording.
Imagine a sonic sphere is encircling your head. When a sound from this sphere hits your left ear first and then the right, your brain understands the sound source is to your left. Binaural recording captures this precise audio path, incorporating the time delay and the frequency modifications caused by the interaction with our head and ears, simulating a ‘3D auditory space.’
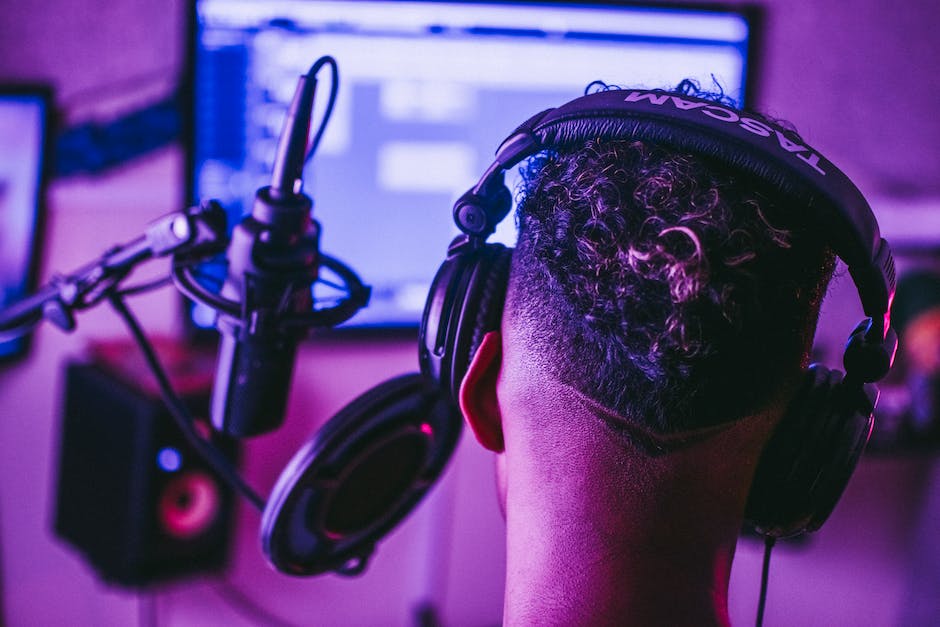
To craft this authentic 3D illusion, an essential tool, christened binaural dummy head microphone, is employed, an eerily accurate replica of a human head stuffed with high-fidelity microphones in lieu of eardrums. Consequently, the binaural recording valiantly mimics the journey of sound into our ear, transporting listeners onto an incredible acoustic carpet ride, evoking the concert hall’s vibrancy or making them feel the palpitations of a beating heart in an ASMR video.
Notably, the most prominent advocate of this technology was the visionary composer, Lou Reed, whose album “Street Hassle” introduced music aficionados to the striking capability of binaural recording to create an immersive environment beyond the forefront of musical boundaries.
Fast forward to today, and the technology continues to be embraced in various arenas, from VR applications to audiobooks, from video gaming to ASMR content, painting an enthralling audioscape that’s incredibly real, vivid, and affective.
The magic of music, after all, lies not just in the orchestration of notes but in the journey it takes us on. Binaural recording brings out this journey in its full glory, rendering a surreal, enveloping, and majestically three-dimensional experience. It’s far from just tape and microphones, but a gateway to another dimension, a defining testimony to how technology and imagination, woven together, can create an awe-inspiring symphony that resonates through the nuances of our perception. It’s truly music – heard, felt, and lived.

History and Evolution of Binaural Recording
One might find oneself wondering about the roots of binaural sound. The history of this sonic marvel can be traced back to the year 1881, at the Paris-based ‘Exposition Universelle’, also known as the World’s Fair. It was here that Clément Ader, a French engineer, presented his ‘théatrophone’ – a two-channel audio system that used parallel telephone lines to broadcast live opera performances to paying listeners. Briefly put, it was the escapade that stepped up to ignite the birth of binaural recording.
Fast-forward to the 1970s, and technology had moved a few steps forward, paving the way for the first commercial binaural album. The album ‘Spaces’ by Beaver & Krause, pioneers of electronic music, was released in 1971. This masterpiece brought binaural recording into the mainstream and opened the door for other artists to follow.
Progressing from there, the digital age boomed, and it came wielding advancements that allowed binaural sound to flourish. With the introduction of digital signal processing, artists could now record and manipulate audio in ways that utilised the nuances of human hearing. Music makers dabbled with these digital miracles, creating sounds that seemed to move around, in, and through the listener.
Fast forward, and you get to the 21st century, where equipment to create binaural sound is more accessible than ever. From indie creators recording ASMR on YouTube to musicians in state-of-the-art studios, the reign of binaural sound is far from over. With evolving technology, the possibilities of what can be achieved with binaural recording are expanding like an unruly symphony.
Presently, we stand on the edge of a new dawn in audio capture and delivery with the rise of immersive audio formats like Dolby Atmos. The legacy of binaural recording continues to be a potent catalyst in this ongoing revolution in the music industry.
But, beyond tech, gadgets and recording equipment, the core of binaural recording remains in its spirit – the quest to closely capture and reproduce the sound and intimacy of real-life experiences. It’s sensory poetry, a doorway into another’s perception. It’s the power, the passion, and the potential of what music can be when it’s not just heard, but truly listened to.
In an age where we can travel through galaxies from the comfort of our homes, binaural recording has become an indispensable tool in shaping these interstellar journeys. As the years go by, this technology only continues to ascend in its sophistication and influence. Indeed, binaural recording is not only an advancement in music technology but rather a pivotal reinvention of how we connect with sound.
We stand in the middle of an evolution, as the boundaries of what is audibly possible are constantly being pushed. And as we stand on this precipice of audio evolution, we are reminded that music – in its many forms and echelons – continues to unite, enthral, and create magic. Binaural recording is not merely a technical tool; it’s a celebration of sound, a testament to human innovation and a musical milestone bearing the echoes of our continued journey through the wondrous depths of sound.

Photo by austriannationallibrary on Unsplash
Binaural Recording Equipment & Techniques
After being swept away by the thrilling journey through the history and advancements of binaural recording thus far, one can’t help but wonder, “How does one get in on this action?” The answer lies in the culmination of passion, vision, and essential gear. For a miraculous marvel in audio engineering like binaural, the list of requisite hardware is surprisingly short.
At the heart of any binaural recording endeavor are a high-quality pair of microphones. More specifically, omnidirectional condenser microphones, perfect for capturing ambient sounds across a spherical landscape. These two are set apart at roughly the average human ear distance in a simulation of human-like listening. Well-loved industry staples for the task are the Neumann KM 183 and the Sennheiser MKH 8020.
Next comes one of the stars of the binaural recording: the dummy head or the artificial head. Don’t be misguided by the disconcerting name, the aim for realism in binaural recording calls for mimicking the human auditory system as closely as possible – as a result, the eerily human resemblance of these head-shaped fixtures with built-in mic placements. Both Neumann KU 100 and the 3Dio Free Space Pro are trusted options.
Entering the realm of digital recording, an Audio Interface is non-negotiable. It takes our analog world of sound, launching it into the digital empire for the heart-stopping manipulation and post-production that can envelop listeners in a multidimensional reality. Recommended options are the Apollo Twin MKII DUO or the Focusrite Scarlett 2i2.
As for the best techniques to utilize, bear in mind that binaural recording triumphs in crafting auditory landscapes that mirror real-life experiences. Set up the microphones in the environment where the sound source naturally exists. Be mindful of the directionality of sound. Experimentation is king here, truly sinking into the environment’s acoustics and understanding the ripple effects of sound.
Understanding the head movement is another crucial subtlety often overlooked. The slightest tilt can usher in new sound dimensions and nuances, transforming a static recording into a living, breathing entity. Record standing up, seated, and focus on head movements to grasp the true essence of binaural stimuli.
Lastly, play around with distance to the sound source and sound intensity—strategically place sound sources at varying distances, from a soft whisper to a thunderous boom. Understanding the intricate interplay between proximity, intensity, and the resulting impact can truly unlock the boundless potential of binaural recording.
Following this passionate pursuit of audio excellence with binaural recording, one becomes privy to truth of sound. A world rigidly bound by a mere left-right equation transforms into a universe of swirling sounds and spatial depth; bringing to the foreground, the unspoken magic of audio realism. Carving out your escapade in the realm of binaural recording is not just a technological milestone, but a testament to how our love for music transcends the conventions of space and time. From inventing the théatrophone to the soaring popularity binaural sound enjoys today, every step is a triumphant dance celebrating the human innovation, our shared love for sound, and the timeless power of music. We are ever-evolving, steadily pushing those boundaries of what’s audibly imaginable, pouring heart and soul in every beat, every chord, and every note. This is the spirit of binaural recording – it captures life, in all its melodies.

Binaural Recording in Different Music Genres
Peering through the gateway created by binaural recording, the enlivening enhancement each genre receives is uncanny and rhythmic to the spirit. From the buoyancy of electronic music to the hefty beats of hip-hop, the melancholy of blues to the intense power of heavy metal—the technique brings each music genre’s distinctive qualities to life, crystallizing the listener’s experience, making it pronounced, intimate, even personal.
In exploring binaural recording’s effect on different genres, a standout example is within electronic music. Take, Yosi Horikawa’s album “Vapor,” for instance. Horikawa utilizes everyday sounds and rhythmically weaves them together, producing an audibly tangible feast. But the real magic happens when listened to across binaural recording, where synthesized notes and bass find their groove beneath the tangible rustle of the rustling bamboo, morphing into tangible soundscape experiences that one could almost touch or feel.
Jazz, with its complex compositions and improvisational nature, benefits significantly from binaural technology. A moving example is “Upward Spiral” by The Branford Marsalis Quartet featuring Kurt Elling; listeners can explore the intricate interplay between each instrument, tracing every line of music as it winds intricately through the mind’s ear. The recording gives a seat at the club, close enough to appreciate each slide, strum, and breath as if yielding to the rhythm of the performance firsthand.
Savoring the raw potency in folk and acoustic music also becomes profoundly engaging through binaural technology. Take Gordon Hempton’s “Earth is a Solar Powered Jukebox: Spring” as an example; Hempton carefully maps the serene ambiance of nature, encapsulating the listener within the sylvan wilderness. Each chirp, rustle, and silence in between is potently magnified to build a symphony only the wild can create.
Celebrating the pure power that music has as a uniting force also showcases the electrifying bass and rhythmic cadence of hip-hop through the binaural perspective. An outstanding album for this genre is “Panoramic Sounds,” where rappers contrast and echo across the stereo field, drums thud from varying angles, and the listener becomes part of the gritty urban landscapes painted by the lyrics.
Innovations in music technology have propelled binaural recording to the forefront, providing listeners of all genres a unique immersive world without boundaries. The journey of tracing beats, absorbing each note, and feeling the vibes more intimately is an irresistible lure for avid followers or first-time explorers.
Instrumental to binaural recording’s success is the significant roles miniaturized, high-quality microphones play. Brands such as Neumann KM 183 and Sennheiser MKH 8020 cater to this need, reproducing near-authentic sound with precision and depth. Expert sculpting of artificial heads or dummies, such as the Neumann KU 100 and 3Dio Free Space Pro, is pivotal to capturing the auditory nuances and creating a wholesome listening experience.
Finally, an efficient audio interface is integral for the digital magic to take shape, with Apollo Twin MKII DUO and Focusrite Scarlett 2i2 leading the pack. These gear combinations become sonic paintbrushes, painting auditory experiences across listeners’ minds, urging them to wander, experience and most importantly, feel.
The beauty of binaural recording is that it does not reinvent the wheel; instead, it dissects it element by element, then intricately weaves them into a cohesive, immersive tapestry. It uncaps the traditional listening experience, transforming it into a new norm, a new journey, a new exploration—an auditory revolution, redefining the majestic power of sound. With constant evolution, the audibly possible sound will continue to push boundaries, serving as a testament to the relentless spirit of music and human innovation.
The Future of Binaural Recording
The future is now and it’s headed in thrilling new directions, particularly in the realm of binaural recording. As a sonic innovation that alters the auditory landscape, binaural recording steps into uncharted territories, exploring the depth and intensity of the multisensory experience. It’s more than just music, it’s an immersive journey that’s equally expansive and intimate, capable of eliciting profound emotional responses.
As the music industry navigates the ever-evolving technological advances, binaural recording emerges as a new frontier. It’s a shift from the traditional sound design toward a more experiential and immersive audio format that offers the listener a heightened sense of realism and presence. Picture raging waves of a music festival, the mighty roar of the crowd, the pulsating beat of the bass – all experienced from the coziness of your living room. This is the future that binaural recording promises.
Electronic music, famed for its manipulation of frequencies and exploration of sonic territories, stands at the forefront of this binaural revolution. Everyday sounds are plucked from their ordinary contexts and reimagined as part of a vibrant soundscape, resulting in an exquisitely detailed and multi-layered musical canvas.
Binaural technology also has the potential to bring a tactile dimension to jazz music. By capturing the subtlest nuances of each instrument, listeners can essentially be transported to a smoky jazz club, where they’re immersed in the intricate interplay of the drums, saxophone, and piano, and feel each rhythmic pulse as if they were there in the room.
Then, imagine experiencing the warmth and authenticity of acoustic and folk music. The guitar strumming resonates as if just inches away. The singer’s voice, intimate and soulful, echoes in your ears, evoking images of a campfire gathering under the blanket of a starry night. This is the beauty of binaural recording, where an ordinary listening experience is transformed into a multisensory journey back in time or to faraway places.
Hip-hop, too, enhanced by binaural recording, becomes more evocative and electrifying. The pulsating bass, rhythmic cadences and sharp lyrical prowess in binaural perspective drive the visceral quality of this genre to new 3D heights, creating an immersive auditory panorama that’s just as thrilling as a live concert.
Integral to this revolution are the miniaturized, high-quality microphones which lend their prowess to capture auditory subtleties, and to sculpture the artificial heads or dummies, carved to precision to mimic the auditory intricacies of the human head. An efficient audio interface then becomes vital in shaping this auditory sojourn, translating nuances into a cohesive aural journey.
Binaural recording is not just a technology; it’s a revolutionary tool giving birth to new realms of the auditory journey. It transforms the passive act of listening to music into a full-blown sensory experience that wraps you up in its embrace, enabling you to feel the music and its vibrations. With ongoing advancements, the potential is limitless – as are the boundaries yet to be pushed in the quest of audibly possible sound.
Embracing the future of binaural recording means recognizing its transformative power for music and sound. This is a celebration of sound, of human innovation, and musical milestones – a testament to our timeless chase of audio realism and immersive experiences. After all, isn’t that what we all seek in a concert or in the privacy of our own headphones: to hear, to feel, and to be part of the music? This is the future that binaural recording promises, and by the looks of it, the future sounds breathtakingly good.
The advancements in binaural recording technology are set to reshape the way we perceive sound, transforming how we interact with music, films, games, and even augmented and virtual reality environments. As the technology develops, we can anticipate a more immersive audio experience, extending beyond merely listening to feeling present within a sonic landscape. Binaural recording enables us to connect with the auditory world on a more profound and intimate level, opening up sensory dimensions we may barely have acknowledged before. It is more than just a method of sound reproduction; it is an art form in its own right, expanding the boundaries of creative expression.
Unlocking the potential in your own home for high-quality audio recording doesn’t have to max out your credit card. It’s in harmonizing the perfect blend of essential audio equipment, implementation of effective recording techniques, and the art of post-recording audio editing that professional sounding audio can truly be achieved. This dynamic triad of audio accomplishment namely, understanding basic audio equipment, mastering audio recording techniques, and executing post-recording audio editing, sets you on the path to producing excellent sound on a budget. Herein, we delve into these integral spheres of audio recording, from your initial equipment setup to the final mastering stage, guiding you through the process of achieving professional sound at home without breaking the bank.
Understanding Basic Audio Equipment
There’s a harmonious blend of intrigue and enthusiasm reserved for those captivated by the mesmerizing sway of music. Frequent flyers on the festival scene, eager attendees of the most groundbreaking live shows, and the spirited ones constantly deciphering the hidden rhythms of life – all embrace music as the soul’s language. And, often accompanied by this melodious inclination, is an urge to create, to join the symphony and make the magic happen. One may wonder, “What’s the essential audio equipment I need if I’m on a budget?” Let’s dive into the vibrant world of sound and peruse through it.
Dwell in the realm of affordability doesn’t mean you have to skimp on quality. Enter the world of music production, readily accessible, if you understand what instruments will resonate with your creative chord and wallet alike.
Tower 1 of our equipment citadel is an Audio Interface
. An unsung hero, it works to translate analog signals into digital ones that your computer understands—thus ensuring that the music you create is effectively communicated. The Focusrite Scarlett 2i2 or the PreSonus AudioBox USB 96 are wallet-friendly gateways into this universe, offering excellent sound quality and user-friendly design.
Moving on, we arrive at our next destination – a solid pair of Studio Headphones
. Critical for accurate audio mixing and mastering, they’re your personal sound sanctuary that allows the inclusion of the minutest details. The Audio Technica ATH-M50x provides professional-grade quality while treading the affordable path. They offer exceptional clarity and a deep, accurate bass response – the perfect companion for music adventurists.
Next, we step into the realm of Studio Monitors
. If you desire to hear the sound exactly as it is, studio monitors are a must. They ensure an accurate, uncolored representation of your music. Prominent in the affordable variety, the PreSonus Eris E3.5-3.5 nearfield studio monitor is a revered choice highly recommended for beginners.
The last but perhaps the most noticeable piece of the price-conscious music arsenal is the MIDI Controller
. This ingenious tool translates physical actions into digital data, offering you the ability to play virtually any sound you wish. The Akai Professional MPK Mini MKII reigns supreme in this sector, providing optimal functionality without burning a hole in the pocket.
Finally, an honorary mention goes to the Microphone
. While not essential for every music prodigy, a quality mic can significantly enhance vocal recordings or acoustic instruments. The Audio-Technica AT2020 is an inexpensive but highly effective addition to the repertoire, allowing beginners and budget-conscious creators to get their voices heard.
And such concludes our rendezvous within the realm of budget audio equipment, a realm where quality meets affordability. The symphony is waiting! Embrace these instruments of creation, and step onto the stage of musical manifestation.
Photo by techivation on Unsplash
Audio Recording Techniques
From the inception of a song idea to its final mix, raising the bar to achieve a professional sound in recordings is a process akin to assembling a heavily intricate jigsaw puzzle. While your equipment, as previously discussed, will serve as your staunch allies in this endeavor, entrusting the entirety of the task to the machines can lead you astray. This endeavor goes far beyond the material; it’s about exploring the invisible terrains of sound frequencies, amplification, and sound quality.
Diving into frequencies first, if there’s one skill aspiring sound professionals should master, it’s rolling off the low frequencies that don’t contribute anything musical to the mix. Often, instruments unintentionally reproduce these sounds which can muddy up the entire mix. Eliminating them with a high-pass filter eases this problem and sharpens the overall quality of the sound.
Balancing is the critical triangle point between frequencies, volume, and panning. Finding the perfect equilibrium among three often involves making many micro-adjustments until it ‘clicks’. Experiment with balancing one sound against another. For example, when a kick drum and a bass guitar compete for the same frequency space, try to EQ wisely. Perhaps you will prioritize the kick in the lower spectrum and add a little high frequency to the bass for definition. Remember, subtlety is the key; minimal adjustment can even out the playing field without making drastic changes in individual sound character.
Never underestimate the power of the lowly microphone position. It can make or break a recording. Many recording newbies make the common mistake of positioning mics too close to the sound source, thereby capturing unwanted noises. The placement of the microphone depends on the instrument. For instance, when recording a drum kit, the microphone should ideally be overhead to capture the whole sound.
Moving on to vocals, the emotional core of many songs. Record each vocal line several times to gather a variety of nuances. The artful blending of these tracks, often known as comping, can bring your entire vocal recording to life. The trick here is to catch the feeling of the song with each singer’s unique flavor.
Also, take advantage of the power of plugins. They contribute significantly to achieving a professional sound. Plugins allow you to simulate professional hardware in your own bedroom. Make sure you educate yourself about which plugins to use for achieving the desired effects. The world of plugins can be overwhelming, but armed with a little knowledge, the treasure chest of options becomes a tool kit for your creativity.
Compressing tracks cannot be ignored. It plays a significant role in controlling the dynamics of the song. A moderate squeeze can add a punch to your mix without killing the dynamic range. Remember, over-compression can make a track lifeless, use it tastefully.
Last but not least, create a sound that resonates with your audience and serves the song instead of merely flaunting technical prowess. Remember, you are creating music, a universal expression of emotions, not just assembling sound frequencies. So let it flow naturally and capture the soul of the sound fluently. Happy recording!
Post-Recording Audio Editing
Picking up where we left off, we are now going to delve into the nuanced art of audio production. There’s more to achieving a harmonious sound than just having the right equipment; understanding how to optimize your audio files through careful editing plays a substantial role in this auditory dance.
Rolling off low frequencies with a high-pass filter is a good starting point in the editing process. This ensures that the rumble, hum, or excess ambient noise often found in lower frequencies doesn’t contaminate the other elements in your mix. Keep in mind, the reduction should be just enough to clear out the unwanted rumble, ensuring the original tonal qualities of the track remain intact paying homage to the pure intentions of the song.
With their audio landscape coming into focus, the accomplished producer will then balance frequencies with an equalizer, adjust the volume of each track, and determine optimal panning positions. Each musical element, from the bellow of a bass to the tweet of a high-hat, should occupy its unique space to prevent a congested mix. Panning can add depth to your mix, creating an enveloping and rich auditory experience reminiscent of a live performance.
Speaking of a live performance, the importance of microphone position should never be discounted. The microphone is the aria’s paintbrush, acting as an infectious liaison between the performer and the audience. For just as a portrait can be affected by the angle of the paintbrush, the sound recording will inevitably be affected by the position of the microphone.
Moving on to vocals, the technique of comping, which involves selecting the best segments from multiple takes, can make all the difference in presenting a cohesive and emotive vocal performance. Even the most gifted vocalists are likely to produce variations in their takes, and comping essentially curates these variations to form the ultimate performance.m
Once you have your tracks recorded and the foundations of your mix established, it’s time to explore the creative world of plugins. Transform your sounds with reverb for space, delay for echo, or saturation for warmth. In today’s digital era, an extensive array of free and paid plugins is available to lend your mix a professional polished sheen.
Another crucial tool in the audio editing process is compression. Compress tracks to provide control over their dynamic range; this technique keeps the volume in check, prevents distortions, and ensures a smooth listening experience. A well-compressed track is like a finely-tuned orchestra, each instrument playing its part, harmonizing and rising in crescendo without drowning out its counterparts.
Finally, and perhaps most importantly, we move towards creating a sound that resonates with the listener. Each decision made during the editing process should have the song as the focal point. Whether melting hearts with a soft ballad or making the pulse quicken with a raging anthem, the sound should serve to elevate the song’s emotional impact, bridging the gap between the performer and the audience.
The melody of music is a universal language that weaves together the diversity of mankind, flowing through borderlines and cultural barriers with unrepentant grace. Remember, each song is an intimate portrayal of the artist’s inner universe. As an audio engineer, your role is not to remake this universe, but to enhance it, to clear the fog that may obscure its beauty, and to amplify its power. By doing so, we dance in this marvelous equilibrium of music creation together. Such is the marvelous power and joy of audio editing.

Once armed with an understanding of basic audio equipment and the know-how of its utilization, along with the knowledge of effective recording techniques, you’re set to embark on your journey into budget friendly, home recording. The final ingredient, post-recording audio editing, ties this all together, allowing you to fine-tune your audio, mitigate noises, balance audio levels, add creative effects, and master the audio for that final, professional touch. Understanding and applying these realms of knowledge doesn’t just pave the way towards budget audio recording, but also empowers you with control over your creative process. So fire up that audio editing software and set up that microphone, as the power to create professional sound at home is truly in your hands.
The world of audio equipment, especially in the music sector, is a fascinating one, filled with all sorts of complex yet interesting components with diverse functions. Among these, preamps stand out as essential parts of the whole construct, significantly contributing to the creation of sound. These complex devices are often misunderstood and overlooked, despite their crucial role in the music and audio production process. In an effort to foster a more solid understanding of preamps, we delve into their fundamental concept, their crucial role in the signal chain, key aspects to consider during selection, and how they contribute in shaping the sound in different music genres.
Basic Understanding of Preamps and Sound
Music is a universal language that requires no words. It’s a wondrous world of rhythm and harmony, capable of captivating the soul and stirring the senses. Among the intricate elements involved in creating these beautiful sonic landscapes, is a little gem known as the preamp.
A crucial component in sound processing, the humble preamp can make or break your sound, but what’s the magic behind it? Dive headfirst into the world of sound processing and unearth the enchanting universe that lies beneath the surface of your favorite songs.
Picture this: A passionate musician pours their heart into a powerful performance, their soul-soaked notes soaring through the air, yet without preamps, the masterpiece remains entombed within the musician’s instrument. Preamps act as the liberator of music, unlocking the gates and setting the sonic symphony free. They are, in essence, the key that ignites the engine of sonic creation, which takes us on a transcendent journey across the emotional landscape of music.
The role a preamp plays in sound processing is somewhat akin to a magnifying glass. The low level signals from microphones or instruments are often whispering echoes, barely audible to the mortal human ear. It’s the preamp’s job to amplify these signals while minimizing any noise interference, producing louder, clearer sounds. Without them, these subtle yet significant details might get lost in translation, turning a symphony into mere sounds.
As aficionados of sound already know, the world of music is colored with a rich spectrum of nuanced tones and timbres. An electronic synthesizer crackles with energy, while a solo violin often sings a melancholy tale with its vibrato. These are not just mere sounds, they are emotional narratives. The magic in a preamp’s function lies within its ability to capture and reproduce these sonic nuances, allowing the musician’s story to be told in its most authentic form.
Moreover, there is no one-size-fits-all when it comes to preamps. As flavors vary in a culinary masterpiece, so do preamps in their sound characteristics. Each presents a unique color palette, capable of adding spectral hues and tonalities to the sound, creating a sonic picture as diverse and vibrant as a symphony of fall leaves dancing in the wind.
Every preamp, like every instrument, has a personality. From the warm, soft-toned tubes to vibrant, harmonically rich solid-states, they all color the musical canvas differently. This valuable tool allows sound engineers to manipulate and blend tones expertly, resulting in a unique, memorable, and magical musical experience.
Therefore, it is important to remember that a preamp is not just another audio gear. It is a vital tool in the creative process, a magic wand that conjures the spellbinding symphony from silence. Understanding the dynamic role of preamps in sound processing allows one to appreciate the countless layers of complexity in music. So next time when you press ‘play’, lend an ear to the intricate dance of well-amplified sounds and remember to appreciate the magical wizardry behind it – the preamp.

Preamps in the Signal Chain
Resting almost invisibly amidst the complex puzzle of the audio signal chain, preamps might just be the unsung heroes of the sonic world. They are the champions of silent whispers, enough to let every note, every riff, every beat be heard in all its intended glory. But like puppet masters operating unseen in the backdrop, where do preamps sit in the signal chain and why does their positioning matter so much?
In the grand symphony of sound, consider preamps as the conductors of an orchestra. Right from the moment an instrument creates sound, they readiness to catch and amplify the raw, unamplified signals. Occupying the first stage in the signal chain, preamps are vitally positioned to interact directly with the initial signal emitted from your microphone or instrument, maximizing the signal strength while minimizing noise. This unique position in the chain allows the preamps to work like the vanguard of an army, protecting the original sonic composition from getting lost in the din of background noise.
The reason preamps hold the prime position in the signal chain is deeply rooted in the nature of audio signals themselves. These signals at their origin are delicate, subtle entities. Left alone, they would barely make any impact. As they journey through the signal chain, they face myriad obstacles. Distortion, unwanted noise, and signal loss are common threats in their path – all capable of drowning out the soft strains of our musical expressions. But when preamps enter the scene, they bolster these signals with enough strength to begin their journey along the chain, giving them the boost they need to make it through to our ears.
The variety in preamp characters defines its essence of sound blending. So diverse are their sound profiles that a preamp could change the tonal color at the start of the signal chain. With the positioning at the first stop of the chain, preamps have the significant advantage of defining the first – and therefore the most impactful – impression of the sound. And it’s this crucial moment of the chain that the multi-faceted nature of preamps really shine.
A legion of sound engineers across the globe cherish the intrinsic significance of preamps in the signal chain. With sensitive controls and diverse sonic possibilities, the preamp offers the creative power to tweak, nudge and whirl the tonal shades – raw and untainted at the source – into an amplified artistic expression, ready to delight listeners.
Harnessing the power of a preamp at the start of the signal chain is like embarking on a grand, thrilling sonic journey, with the quietly confident conductor guiding our way from the first note. Preamps’ position in the chain holds the magic wand that breathes life into raw signals, transforming them into amplified narratives that stitch together the mesmerizing tapestry of sound – beautiful, overwhelming, and endlessly fascinating.

Considerations When Choosing a Preamp
Unearthing the Heart of the Beat: Zeroing In on the Ideal Preamp
In the grand concert that is music production, preamps take the podium as the unassuming conductors, subtly but expertly guiding the symphony of sound to a complete and fulfilling crescendo. Selecting the perfect preamp isn’t just about enhancing sonic quality; rather, it marks the fine line between the ho-hum and the truly transformative, sketching the nuanced narrative of our aural epic.
Artistry of Audio Circuits: The Path to Transcendental Sonic Experiences
Preamps are more than mere circuits in an audio chain. They’re your gateway to an immersive sonic universe, your segue to a reality where notes bloom, where chords cascade, and where every beat throbs with palpable vitality. Thus, when diving into the hunt for the ideal preamp that would become your trusted copilot in this sonic exploration, the first thing to consider is its audio circuit design. Solid-state or vacuum tube, each holds a unique allure. While solid-state basks in the brilliance of accuracy and crispness, vacuum tubes revel in a warm, lively flair, rendering a vintage, organic hue to sounds.
Bended Signals, Unbended Intentions: Output and Input Impedance
Hidden in the less glamorous specs sheet are the output and input impedance that play a critical role in determining the compatibility and performance of your preamp. The key is to match the preamplifier’s output impedance with your power amplifier’s input impedance. Get this balancing act right, and you’re all set for a harmonic and distortion-free audio experience.
Little Dials with Big Impact: Gain and Headroom
Decoding the myriad possibilities of tonal manipulations, gain and headroom are the silent players stringing together the overtones of drama in the soundscape. They allow for the pristine capturing of those in-between silences, those crescendo rises, and decrescendo ebbs, morphing the ordinary into the extraordinary. A generous headroom ensures that transient peaks are accurately amplified, maintaining integrity, while a wide gain range provides the necessary flexibility to handle a variety of input sources.
The Invisible Aura: Noise Factor
Consider also the noise factor of your potential preamp, that invisible presence capable of morphing resounding melodies into irksome cacophonies. Various aspects such as power supply design, component quality, shielding, and grounding contribute to the preamp’s noise figure. Seek out a preamp with a low noise floor, as one must remember, a perfect melody isn’t about the loudest notes, but about the clarity and purity of every note that contributes to the composition.
In the grand scheme of music production, preamps may just be a cog in the machine, yet, perfecting their selection could greatly elevate your symphony of sound. They brim with their own quirks and tonal personalities, each potential partner in your sonic journey awaiting to be discovered. Due diligence in selection, therefore, carries the potential to play the perfect accomplice to the brilliance of the musical tapestry, elevating every note, capturing every beat, and binding together the universal language of music.

Applications of Preamps in Various Music Genres
Unfurling layers deeper into the world of music production, we plunge into the ocean of audio circuit artistry where two titans exist: solid-state and vacuum tube preamps. Each holds its unique charm and stirs the air differently, subtly influencing the overall symphony of sound.
On one hand, solid-state preamps have a reputation for being gritty, reliable, and capable of capturing a more truthful sound, which lends them perfectly well to capturing the raw essence of jazz or the abrasively joyful noise of punk rock. On the other hand, vacuum tube preamps contribute a warmth and depth that many vintage-loving, tone-chasing audio aficionados find irresistible. These preamps color the music with lush harmonics, reviving the golden era of rock ‘n’ roll and blues.
Behind the seamless flow of melodies and tunes, behind the foot-stomping beats and soul-stirring solos, lies the galvanizing role of output and input impedance. A harmonious match of impedance ensures premium performance and compatibility of the preamp with other elements in the chain. It’s crucial to consider these connections like the veins of a vast, melodious body, resonating the intricate symphony of genres from the pulsating jungle beats of tribal house to the ghostly whispers of ambient synthesis.
As the music scenes cross-pollinate, the boundaries blur; the need to manipulate tonal dimensions becomes paramount. This is where the aspect of gain and headroom arises, like the tide that raises all ships. How loudly a genre roars or how gently it whispers can be subtly finessed by these variables. A high-gain beast might be perfect for the earth-shattering growl of heavy metal, while dance pop could use a microscope on headroom to maintain its tight, pulsating beats.
Sound engineers have the power of Zeus at their fingertips, and they are well-aware that every god has his nemesis. In the arena of audio production, noise is the eternal foe. The selection of preamp often becomes a battle strategy against this unwelcome guest. The lower the noise factor, the higher the odds of producing a crisp, squeaky-clean sound that pop and electronic genres often pine for.
Preamps, then, are the unsung heroes, the silent cheerleaders powering the music we love, flicking switches on the emotional rollercoasters sound can set in motion. From the mellow twang of a country guitar to the guttural roar of death metal vocals, preamps offer more than amplification, they mold the spirit of genres, existing as the unseen conductors guiding our auditory journeys.
Like artists with a broad palette of colors, the dedicated sound engineers, artists, and music lovers appreciate the potentials of preamps. In their hands, the preamp is the magic wand that awakens the dormant beauty of an acoustic sound or the electric storm within an amplified note, a tool that brings forth the symphony of frequencies and carries music’s sheer ability to move, to thrill, and to unite. Arriving at this juncture, it is undeniable that the right preamp, deployed correctly, vastly influences the unique sounds across the cosmos of music genres. Sharpening this understanding can elevate the power and depth of any auditory experience, always examining past the facade into the magic beneath sonic creation’s surface.
Remember, knowledge is power. Whether you’re a sound engineer flexing your prowess over a mixing console, a musician fueling your creative process, or simply a music enthusiast tinkering with your hi-fi stack, a good preamp could be the game-changer you’ve been seeking in your quest for the perfect sound.

Having shed light on the critical role and influence of preamps in music and audio production, it is clear that these miniature devices immensely contribute to the magic that we call music. From the moment an instrument or microphone emits a sound to when it finally hits our ears, preamps work tirelessly to ensure that the best possible sound quality is preserved. They not only define the tonal character but greatly determine the overall output’s sound quality. Depending on the genre, the type and settings of the preamp can dramatically change the music’s color and tone. Therefore, understanding their significance is undeniably crucial for anyone seeking to make great music.
The art of recording vocals extends beyond simply having a good voice and a high-quality microphone. It requires a deep understanding of various components integral to vocal recording like different types of microphones and their most effective uses, acoustics of the recording space and its setup, as well as post-production steps such as sound editing and mixing. Whether you are an aspiring singer, a budding podcaster or an established voice-over artist, the journey towards recording crystal clear vocals is one that involves mastering these various facets, which are essential to deliver a top-notch vocal output.
Microphone Techniques
Title: Striking The Right Note: Effective Microphone Techniques For Crystal-Clear Vocals
In the symphony of music creation, the melody of vocals often reign supreme. The singer is the storyteller, transforming lyrics into raw emotion, their breathes and pulses painting a vivid soundscape. If you’ve ever bathed in the ethereal notes of an immaculate vocal performance, then you understand the importance of clear, powerful vocals. As the pinnacle of this harmonic hierarchy, vocals deserve an unblemished platform for their performance. So, how can one achieve this? The answer lies in mastering effective microphone techniques.
Firstly, any maestro of sound understands that the selection of the microphone is as crucial as a composer choosing the right instrument for their composition. For vocals, dynamic microphones prove to be a trusted ally for live performances. These stalwarts of the sound world offer durability and can withstand the full vocal force produced, while condenser microphones offer a delicate touch, preserving the subtleties of the human voice for studio recordings. Much like a music festival, where every genre has an optimal stage, each vocal style has a microphone match, ensuring clarity and perfection.
Second on the composition sheet is the aspect of microphone positioning. The distance between the microphone and the mouth creates a dance of sound and silence, with slight variations leading to a drastic change in the final output. Close up, an intimate whisper or Diana Krall-style jazz; a few inches away, a roaring rock ballad. Analyze the genre, the emotion that you’re weaving into the rhythm, and then stage your microphone appropriately.
One technique often used by the vocal virtuosos is the Angle Approach. An angled microphone tends to catch imbalances in tonality and dissipate plosive sounds that chop the flow of melody. Be it a fervid folk performance or a summer night serenade, the Angle Approach remains a tried-and-true method to ensure vocal clarity.
Implementing strategic Pop Filters further polishes vocal performance, acting as a guard against harsh consonants that create unwanted distortion. A pop filter’s intrinsic function is to gently cradle the sound of each word and present it as a smooth composition, easy on the listener’s ear.
Last but certainly not least in this arrangement of microphone techniques is Gain-Setting. Controlling the microphone gain effectively serves as an expert conductor leading an orchestra. It meticulously manages the volume levels avoiding overpowered resonating noise or a barely audible lament. Proper gain setting lets your vocals carve their space in an ensemble, presenting them in their best light, their clearest note.
As in a musical journey where you hop from one music fest to another, savoring different genres and appreciating the magic of music, understanding and learning microphone techniques is a road to be traveled. Picking up nuances, experimenting, and eventually finding your vessel to the world of crystal-clear vocals. So, embrace the challenge, for in the end, the raw emotion of your voice, the tale that your melodies tell, will resound with stunning clarity, wrapping your audience in the spellbinding beauty of music.

Room Acoustics and setup
The Sonic Canvas: The Integral Role of Room Acoustics and Setup in Capturing Pristine Vocals
Moving beyond the vital aspects of microphone selection, positioning, and gain-setting, the succeeding frontier in achieving stellar vocal recordings lies with room acoustics and setup. In the same way an artist carefully selects the canvas for their masterpiece, musicians and sound engineers must pay keen attention to the aural realm the vocals will inhabit.
Room acoustics has a profound impact on the vocals’ overall sound. At its core, acoustics refers to how sound behaves within a specific space—the way it travels, reflects off surfaces, and ultimately reaches the receiver’s ears. For studio recording, the “receiver” is the microphone, acting as a discerning ear imbued with the power to make or break the sound of your recordings.
When crafting the ideal vocal recording environment, it’s all about achieving a balance between absorption and diffusion. Too much absorption can make a room sound ‘dead,’ lacking in the natural ambience that gives vocals an organic feel. Excess diffusion, conversely, sends sound bouncing randomly around the room, potentially causing distracting echoes or a muddy audio quality. The ultimate goal, then, is to reach the ‘goldilocks zone’ – a space that is not too live, yet not too dead, just right for capturing clear, pure vocals.
Getting this balance requires an acoustic treatment – a process that entails the strategic positioning of absorption and diffusion materials within the room. Absorption materials, like foam or fabric panels, “soak up” sound waves to minimize echo, while diffusers scatter sound, preventing it from concentrating on a single spot. Typically, absorbent materials are set up at reflection points where sound waves are likely to bounce off, while diffusers occupy other sections of the wall to create a uniform, well-balanced sound field.
Another critical element of room setup is the recording booth’s location. For those without a dedicated booth, finding the quietest part of the house or studio devoid of external noise like traffic, machinery, and chatter is crucial.
Additionally, the vocalist’s position matters. Singing into a corner or toward a flat wall can rebound sound waves back into the microphone, causing audible, undesirable effects. Aiming vocals into an open space or toward a diffuser can help mitigate this phenomenon.
Lasty, take heed of the elements in your room that might unexpectedly contribute to acoustics. Bookshelves stacked with books make for excellent diffusers due to their irregular shapes. On the flip side, large, flat surfaces—like tables or uncovered hardwood floors—can bounce sound around unpredictably. Some improvisation (like adding a rug or positioning baffles) might be needed to dampen unwelcome reflections.
All in all, evoking sheer musical genius goes beyond the lyrics and melody. It extends to the intricacy of sound capture, heralding an overlooked art born of the harmonious marriage of technology, physics, and an unyielding quest for musical perfection.
Sound Editing and Mixing
Taking all that into consideration…
It’s time to journey forward into the realm of sound editing and mixing, where the core of vocal clarity comes alive. This process is equally critical as these two complementary processes help shape raw vocal recordings into polished, resonating masterpieces.
Just as a sculptor carefully chisels away at a block of stone to reveal the hidden figure within, sound editing is the initial stage where the unnecessary elements of the recording are trimmed away. Breath sounds and other track noises, although natural during live performances, can be a distraction in recorded music. Silence or the reduction of these sounds in the editing process means that the essence of the vocalist’s delivery has undivided attention, shining in clarity and purity.
Further refining the vocal sound, the process of equalization (EQ) plays a significant role. It adjusts the balance of all frequency components in the audio recording, ensuring that the mid frequencies, which usually carry the bulk of the vocal content, don’t outshine the lower (bass) and higher (treble) ranges. This ensures the final output preserves the original richness, warmth and sparkle essential to a well-rounded vocal sound.
Next, compression becomes a potent tool to elevate the consistency of the vocal track. By narrowing the dynamic range – the gap between the loudest and softest part – compression makes sure the delivery is more uniform. This way, even the quietest whispers will be as audible as the powerful choruses, granting each word, phrase, and note the listener’s full attention. Consequently, vocals emerge clear, intimate, and impactful.
Sound editing also embraces the application of pitch correction tools in a developmental and understated way. Skillfully used, auto-tune isn’t about perfecting every note, but more about subtle adjustments. It ensures that the vocals sit comfortably within the tonal landscape designed by the music, bolstering the overall musicality without sacrificing the unique character of the singer’s voice.
Sound mixing, on the other hand, is where the vocals’ clarity synchronizes harmoniously with other musical elements. Relationships are built between the vocals and other tracks. It’s a quest to ensure that the vocals emerge as a dominant force to stir emotions, yet simultaneously allowing the synergy of backing instrumentals to dance in the listener’s ears.
Reverb and delay effects work to design a ‘sonic space’ around the vocals, making them seem located within a three-dimensional landscape, rather than sitting flatly on top of the mix. Careful panning of backing vocals or instrumental elements opens up space, allowing the main vocal track to command the center-stage while maintaining a rich and immersive audio experience.
In summary, while many factors contribute to the sourcing and capturing of great vocals, it’s in the subtle craft of sound editing and mixing where the artist’s voice genuinely finds its form. This delicate process is not simply a technical necessity, but an art in itself, a sonically woven tapestry that amplifies the emotional resonance and crystalline clarity of what it means to sing, to express, and to be heard.

Taking the journey through varied realms of vocal recording, from understanding the appropriate use of microphones, to creating a conducive environment with optimized room acoustics, and finally, the harnessing of sound editing and mixing techniques, we can see that producing crystal clear voice isn’t a result of chance, it is an art. It is the outcome of a deliberate combination of industry knowledge, the right equipment, and meticulous preparation. Once you grasp these aspects, then the path towards capturing vocals, that are not just audibly pleasing but also brimming with clarity, becomes increasingly achievable. Through this progressive exploration, the insight gained, enables us to appreciate the nuanced intricacies present in the process of recording impeccable vocals.
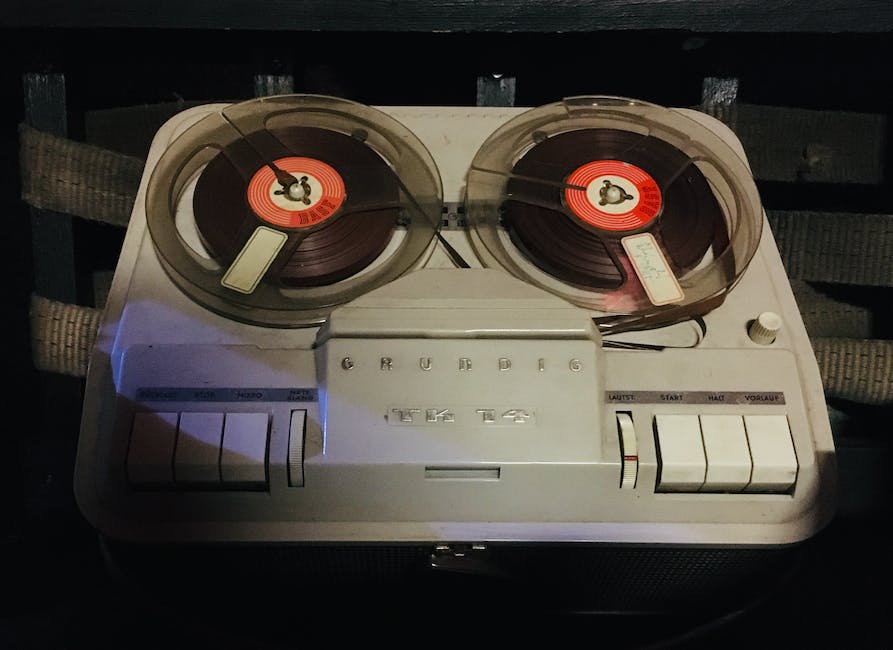
In the vast world of music production, a remarkable phenomenon is the resurfacing of yesteryears’ practices, with the resurgence of tape technology at the helm. Harking back to an era where music seemed to bear a deeper, tangible connection to its creator, the magnetic tape represents a symbol of authenticity, artistry, and nostalgia—a stark contrast to our present digital landscape. With its distinctive ‘warm’ sound characteristics due to tape’s inherent ‘imperfections’, analog recording has seen a revival, and not just as a nod to nostalgia. This new wave of analog affection aims at redefining modern music and leads us back to the basics where music was first crafted amidst the ‘hiss’ and ‘hum’ of tape machines, the Rolls-Royce of recording mediums.
Understanding the Tape Resurgence: What does it mean?
Bring out the vinyl records, dust off the turntables, and dive into the archives of that long-lost cassette collection – the analogue sound is making a comeback. Jumbled between the clean digitized notes, the pristine symphonies, hardened rap verses, and swift balladic strains, lurks the crackle of a bygone era. A melodic nostalgia, subtly audible in the resurgence of an old pal, otherwise consigned to the annals of history – the humble tape.
Indeed, space, time, and technology might have ushered us into the digital age of music, but will never rip away the throbbing bond that tethers the music lover to the tape. The tide is turning, ushering in an era of modern recording where the analog heart yearns for the warmth, texture, and richness of sound embodied by tape recordings.
But why is this phenomenon resurging now? Why is tape, considered an almost obsolete format, suddenly gaining newfound popularity?
At its core, a tape imbues music with a depth, a warmth, a distinctly human touch that cannot be replicated in the precise, faultless digital domain. It’s almost as if you are privy to an intimate conversation, a dialogue between the listener and the musician. Cherished, protected, nurtured within the secure interface of the tape is an art form – each crackling note a testament to its robust aesthetic and passionate craft.
Admittedly, the magnetic charm of a music tape goes beyond the mere sound it produces. Each cassette carries within it a reservoir of tangible history, of memories spun into rich melodies. The tactile nature of using a cassette holds a sort of organic, time capsuled intimacy – from the smooth, rotating wheels to the hours each one retains. A connection is formed that transcends beyond the limits of sound, into the physical realm of perception and experience.
Moreover, technological advancements in the realm of recording and the high-end equipment now accessible even for aspiring musicians, have made it possible to extract the most striking, beautiful sound qualities from tape – called ‘harmonic distortion’. Today, numerous artists, both renowned and emerging, are incorporating this technique, combining the high-tech with the historic, blurring the thin line between the analog and digital.
Every song laid down on tape carries within it an overwhelming sense of one-of-a-kind uniqueness, a seductive allure that keeps pulling the listener in, deeper and deeper. It is this essence of singularity that has triggered the resurgence of tape in modern recording. Each tape, each album, each song stands as an individual entity, encapsulating the ephemeral magic of that one performance.
Delving into this world, it becomes clear that music lovers are increasingly seeking authenticity. They crave that raw, firsthand experience, the pure sounds unperturbed by crisp digital manipulation. In the quest for genuineness, tape offers a breath of fresh air. It reminds us to embrace imperfection, revel in human connections, and celebrate the ever-constant evolution of music. And this is why, even in our modern era, tape isn’t just staging a comeback; it’s outlining our future. A future honoring the lush past while navigating through the limitless expanse, never ceasing to mesmerize, to excite, to allure, reminding us that music, in its infinite forms, will always be an inextricable part of us.
Analog Affection: The Aesthetics and allure of tape-generated sound quality
Delving into the aura enveloping the world of tape-recorded sound and its pivotal role in shaping the aesthetics of contemporary music, it is imperative to unveil the mystique of magnetic tapes and their organic resonance.
Amid stifling waves of digitization, the intoxicating allure of glorious tape-recorded melodies remains undimmed, fostering a newfound sense of intimacy that deepens our connection to music on a visceral level.
Magnetic tape recorded music boasts an inherently organic sonic quality that is often perceived as ‘warmer’ and ‘richer’. The roots of tape’s indomitable status in musical lexicon, however, extend beyond the realm of nostalgia and into the territory of untamed aesthetics.
As opposed to the stark precision and sterile perfection of digital sound, tape’s eccentricities, idiosyncrasies, and subtle imperfections often mimic the complex textures of human emotion. This enriches the sonic palette, replacing the homogeneity of digital production with a flavorful concoction that teems with character and depth.
Notably, the fluttering idiosyncrasies, random grain, and soft clip saturation adorned by magnetic tapes serve as powerful catalysts for creativity. They coax musicians and audio engineers out of their comfort zones, revealing intricate sonic landscapes that break taboos and invite exploration. As a result, the embrace of tape has opened the floodgates for an avalanche of ingenious melodic concoctions that defy the norm and enter previously uncharted terrains of sonic artistry.
In a world where music can often feel disposable, using tape encourages musicians to focus on creating a meaningful body of work. It presses artists to delve deeper, to transcend beyond the superficial layers, to create music that rings with a beautiful sense of purpose.
Tape live recordings, albeit a small piece of analog universe, undertook an integral role in redefining the essence of live music. Combining the electrifying spontaneity of gigs with the organic warmth of tape, these recordings have turned concerts into immersive sonic journeys. The inclusion of ambient noise, crowd cheering and even the performers’ banter injects an added dose of tangibility, capturing the intoxicating spirit of the concert and bottling it for posterity.
In essence, the impact of tape-recorded sound on the aesthetics of modern music cannot be overstated. It is the rebel song in an industry dominated by plastic pop. Magnetic tape has essentially become a musical instrument in itself, shaping the tonal characteristics and harmonic complexities of the music, thus, giving birth to unique sonic qualities that no digital format can replicate.
Armed with the power of nostalgia and the charm of characterful sonics, the humble tape continues to wax its poetic influence in the dynamic world of modern music. Far from being a mere relic of the past, it stands as a loud statement that celebrates the beauty of imperfections, the allure of organic warmth, and the refreshing embrace of individuality in a world primed for digital perfection.
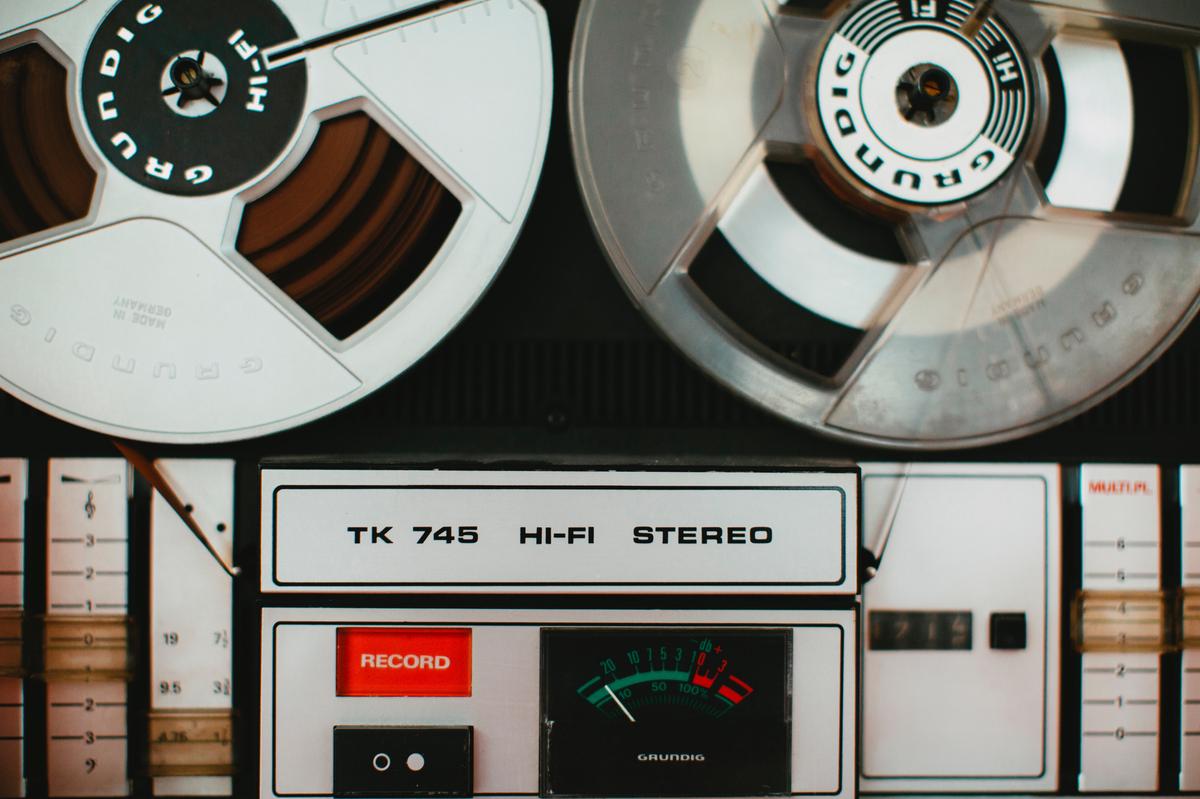
Photo by markusspiske on Unsplash
Instruments Revamped: The Rolls-Royce of the recording medium
With an empathetic nod to nostalgia, it’s impossible to ignore the profound influence that vintage tape machines have on today’s recording technology. Harnessing the vestiges of an era defined by immeasurable creativity and originality, these time-honored contraptions accentuate the inherent mastery in every music piece. This marriage of yesterday’s music machines with today’s technological innovations draws a captivating picture, brimming with sonorous flavors of yesteryears yet coupled with the clarity, breadth, and punch of contemporary music production.
One of the most fascinating aspects of these storied devices is their infusion into digital audio workstations. Analog emulators, plugins developed to replicate the vintage warmth and charm of tape, provide an unparalleled experience that defies the sterile precision of digital sound. These “virtual analog” tools are a testament to the enduring appeal of tape machines, creating a remarkable blend of old-world charm and modern technology’s slick efficiency.
While this technological mingling perfectly reproduces the conventional tape hiss, the real magic lies in simulating the tape saturation, an appealing degradation that occurs when an audio signal is recorded too ‘hot’ onto tape. This effect endows recorded sound with a warm and lush texture, giving music a dynamic range that’s organically pleasing to the ear. Sonic anomalies that would seemingly detract from the listening experience instead deepen its aural richness, much like the beauty of a perfectly pitched voice breaking with emotion.
The newfound popularity of reel-to-reel tape recording among a new generation of musicians and music lovers only reiterates the enduring allure of this antiquated technology. Audibly distinctive in its output, the reel-to-reel brings a sense of dimensionality to sound that digital technology often fails to accomplish. These devices offer a strikingly wide frequency response, brilliantly capturing the whole range of high and low notes, thus creating a vivid impression of ‘being in the room’ with the musicians themselves.
As tape machines continue to regain territory in the evolving landscape of sound recording, it’s clear that the tactile experience of dropping a needle on a record, or threading a reel-to-reel machine, touches a chord in every music lover’s heart.
While the golden age of tape may have passed, its ethereal legacy is reflected in modern methods, allowing a pivotal part of our rich musical heritage to cascade into future generations. Analog whether actual or simulated, remains squarely at the vortex of this musical cyclone, forever reminding us that the essence of great music lies not just in pristine production but in the soulful ambiance and palpable emotion it evokes.
And so, as the cyclical tale of music technology continues to turn, don’t be surprised to find an increasingly harmonious blend of the old and the new. A beautiful symphony born out of the cries of antiquated, whirring relics harmonizing with the sleek hum of digital technology. Music, like water, shapes its course according to the manner of the terrain it encounters, carving new paths while faithfully retracing its steps. It’s an enchanting dance between past and future, delicately balanced by the rhythm of the present. A dance that continues to fuel our endless fascination and profound love for all things music.

The Analogue vs Digital: A Contemporary Musical Debate
Paralleling to the renaissance of analog recording, digital methods comprise an equally salient role in the music world. Renowned for precision, flexibility, and practicality, digital recording methods remain a foundational element in today’s music creation and distribution. An echo of the dawn of technology, it was the birth of digital recording that redirected the narrative of music history, a journey that thrives in contemporariness.
Embodying transparency and fidelity, the striking clarity of digital sound distinguishes it from its analog counterpart. The ability to capture precision auditory images, spotless, and distortion-free, renders digital recording an accomplished tool in the preservation of intended composition. There are no tape hisses, no fleeting frequencies, only the artists’ intention as they meticulously crafted their creation.
In today’s recording studios, digital methods present endless possibilities. The luxury of limitless tracks, the boundless autotune potential, and the array of effects plugins echo the infinite creative spectrum at disposal. Embracing digital technology in modern music production has become not just a trend but a revolution, intensifying the creative expression and auditory experimentation.
Music being a universal language, digital methods have democratized its production and distribution. The compactness and affordability of digital audio workstations nourished the rise of bedroom producers, democratizing music creation and fostering the emergence of divergent genres. In an era described as content-driven, the boundless adaptability of the digital method has fostered a generation of artists whose voices would have otherwise been unheard.
The instantaneousness of digital recording has accentuated immediacy and convenience in the music production process. Where once countless hours were spent splicing tapes and waiting for reels to rewind, now, a simple click or a touch of a button initiates the journey of creativity. This has undeniably accelerated the evolution of music production, opening up new portals into the exploration of sonic capabilities.
But while the aforementioned characteristics portray digital recording as a technological marvel, its flawless rendering of sound has sparked an ongoing debate. Critics argue that digital recording presents a sterilized version of music, stripped of the texture that analog methods effortlessly imbue. Concerns of overcompression, and overdependence on technologies such as autotuning have fueled a narrative of digital methods robbing music of its humanity, its visceral connection.
Consequently, a harmonious blend of both analog and digital recording methods seems increasingly prevalent. Artists and producers, in their relentless quest for originality, are finding solace in this marriage of technology. Pairing the warmth and color of analog recording, with the precision and flexibility of digital methods, they craft sonics that touch the soul, and embolden the spirit, thereby adding a meaningful chapter to the cyclical stratum of music history.
While the analog vs digital debate continues to spark lively conversations and artistic endeavors, one thing becomes abundantly clear – the choice between methods is less a decision of superiority, and more so a reflection of different creative objectives, varying auditory preferences, and unique expressions of musical storytelling. Amid the ebb and flow of technology, music, an art form steeped in emotion and primal connection, forever remains the steadfast lighthouse guiding artists and listeners alike.
Future Sonic Fidelity: Envisioning the future of tape in modern music recording
As we charter into a new era in the music industry’s evolution, defined by the integration of digital technologies and analog methods, tape continues to hold a unique and profound significance. Its entrancing magic, loved by music aficionados and professional musicians alike, lives on through the rhythmic loop of its elastic heartbeat. The warmth and depth evoked by tape cannot be replaced entirely by the cleanest of digital recordings. The artistic challenges and nuances of using tape in modern recording, particularly reel-to-reel recording, act as incentives to creators, cultivating a adoration for the medium that transcends time and technological advancements.
High-profile artists and amateur musicians alike continue to seek the inspirational power and nostalgic familiarity associated within the masterful manipulation of a tape machine. The aesthetics of tape recording ensures that no two records will ever be exactly alike, nurturing a unique footprint on each recording that cannot be precisely replicated digitally. This facet will drive the continued use of tape in modern recording as musicians strive to create individualistic, expressive works.
Advancements in modern recording technology have sought to emulate the beloved properties of tape. Sophisticated software plugins integrated into digital audio workstations forge harmonious marriages of digital precision and analog warmth, rendering a renaissance for the tape aesthetic within the digital realm. Additionally, music production tools like virtual analog plugins give creators the ability to impart the characteristically warm, saturated tones of tape onto their digital tracks. These innovative advancements mirror the continued significance music producers place on the enduring allure of tape.
On the flip side, as digital recording propels forward with ever-advancing technologies, an essential balance emerges. Despite digital recording’s precision, clarity, and boundless creative potential, it must be delicately contrasted against the appealing warmth and nostalgic charm of analog methods to provide depth and texture. Despite digital’s instantaneousness and convenience, the tactile experience of threading a tape through a deck, adjusting the gain knob, anticipating the delicate magnetic dance, creates an unmatched sense of musical immersion.
As we stand at a crossroad between analog and digital realms, we see an expressive fusion of the old and the new – a testament to the cyclical nature of music technology transforming with creativity and emotion at its core. The further we delve into the digital era, the more we unearth the essential beauty of analog methods. The music world’s recognition and celebration of its roots, of touching the texture of a vinyl or the substance of a tape, is an essential component of preserving the emotional connection within music.
In essence, tape will continue to hold an irreplaceable role in modern recording. Its unique sound characteristics will continue to be sought after and celebrated, its essence captured and blended into digital methods. Music, as a connecting, emotional, and expressive art form knows no bounds. As we move forward, our past helps to shape our future, ensuring the continued importance and timeless legacy of tape in the territories yet to be explored in modern recording.
As we stand at this crossroads of mixing the old with the new, tape technology, with its fascinating blend of vintage appeal and modern possibilities, offers an intriguing path ahead. This rather romantic crescendo towards the staple of our sonic past is not just a fleeting sentiment for a bygone era, but a medium for today’s artists to express their creativity in novel ways. Perhaps, the lure of something deemed ‘authentic’ and ‘real’, represented by tape, proves that the old adage, ‘what goes around comes around’, holds true, even in the fluid realm of music production. As we advance, we can only speculate on the future of tape in modern recording. Will analog continue to charm musicians, carve its path, and spur innovations within this digital age? Only the resonance of time will reveal what lays beyond the horizon for these harmonious echoes of the past.
Page 5 of 24 « First ... « 3 4 5 6 7 » ... Last »